There’s something special about adding a personal touch to your garden. A plain flower pot can feel just that—plain. So, I created this post to inspire your creative side and help you transform those ordinary pots into stunning pieces of art. Whether you’re a seasoned gardener or just starting out, these ideas can spark joy and add flair to your green space.
If you love getting crafty or are looking for ways to breathe new life into your outdoor (or indoor) plants, this guide is perfect for you. You’ll find a variety of painted flower pot ideas that suit different styles and skill levels. From whimsical designs to elegant patterns, there’s something here that can resonate with your gardening journey.
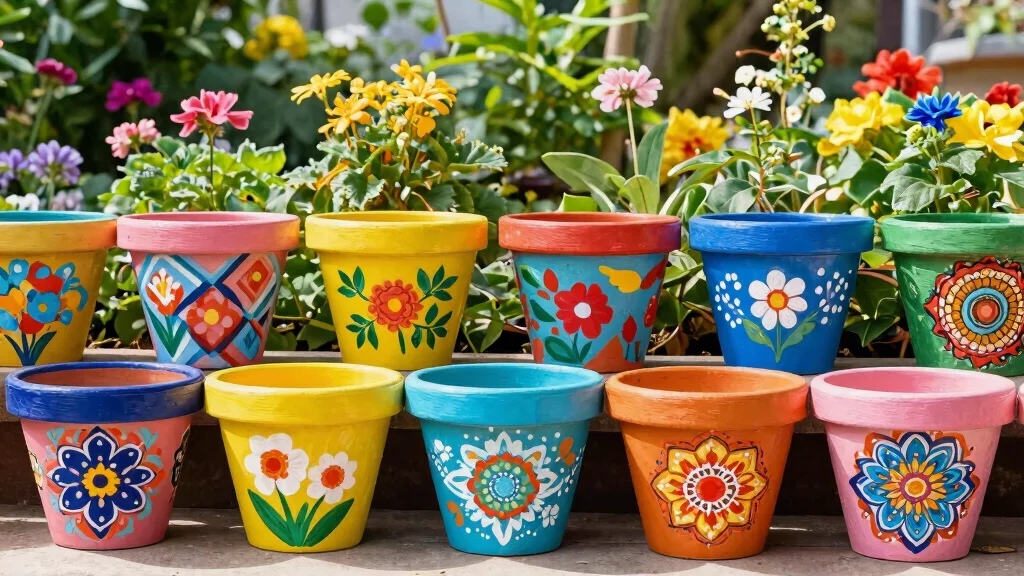
Get ready to explore 12 unique DIY flower pot designs that will not only beautify your environment but also reflect your personality. These creative planter ideas will help you turn those upcycled garden pots into eye-catching decor that makes your plants stand out. So, roll up your sleeves and let’s get started on these artistic gardening projects!
Key Takeaways
– Discover 12 different painted flower pot ideas that range from Bohemian chic to nature-inspired designs, perfect for any garden style.
– Learn how to use upcycled materials creatively, making your flower pots both eco-friendly and stylish.
– Enjoy step-by-step DIY tips for each design, ensuring you can achieve great results regardless of your crafting experience.
– Find inspiration for seasonal themes and personalization options to make your planters truly unique.
– Get practical advice on materials and methods, helping you turn your gardening dreams into reality with colorful and artistic pots.
1. Bohemian Chic Pot
Infuse your garden with bohemian charm by painting terracotta pots in earthy tones. Colors like muted reds, browns, and greens create a warm and inviting atmosphere, while gold or white accents add a touch of elegance. Using a sponge to dab paint gives a textured appearance, perfectly blending floral motifs with geometric designs for a unique aesthetic.
To bring this style to life, choose high-quality acrylic paints that reflect your vision. You can easily find budget-friendly terracotta pots at local garden centers or craft stores. This look connects you to nature, offering a cozy and artistic vibe that enhances your outdoor space.
Consider these tips to perfect your bohemian chic pot:
– Pair earthy tones with gold or white highlights
– Use sponges for a textured paint application
– Incorporate floral patterns with geometric shapes
This creative approach not only beautifies your garden but also adds layers of texture and color, making your pots truly stand out.
2. Nature-Inspired Designs
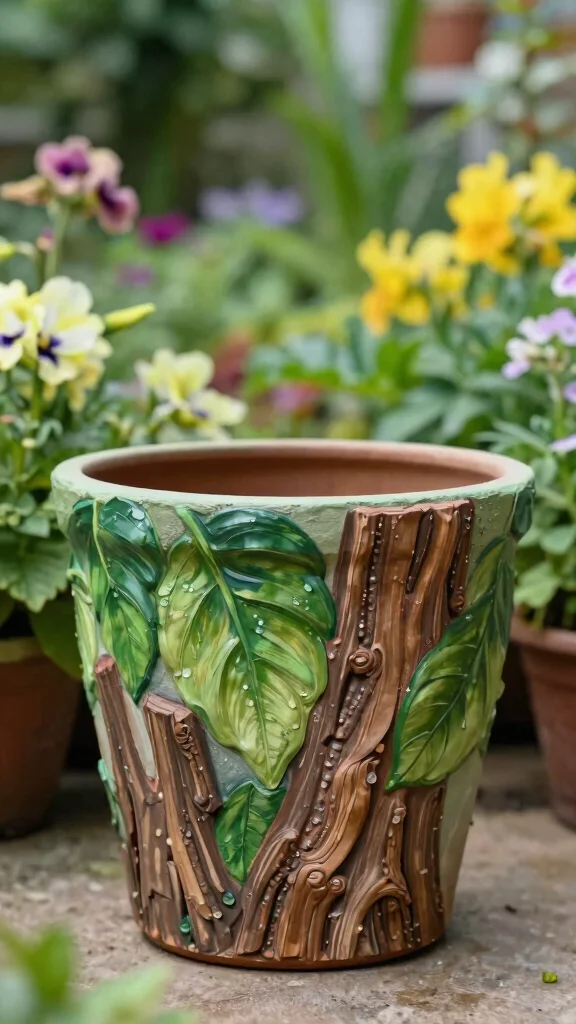
Celebrate the wonders of the outdoors by crafting flower pots adorned with nature-inspired designs. Leaf patterns, tree bark textures, and animal motifs in greens, browns, and soft pastels celebrate the beauty of the natural world. This theme creates a serene and organic feel that complements your garden beautifully.
To achieve this enchanting look, start with plain pots and select acrylic paints in nature-inspired colors. Using a fine brush for detailing allows for intricate designs, letting you capture the essence of nature on your pots. This approach not only beautifies your space but also fosters a deeper connection with the environment.
Here are some ideas to create your nature-inspired pots:
– Paint the entire pot a light base color
– Use a fine brush for delicate leaf or bark designs
– Layer various shades for added depth
Your nature-inspired pots will harmonize with your garden plants, creating a peaceful retreat filled with organic beauty.
3. Bright Geometric Patterns
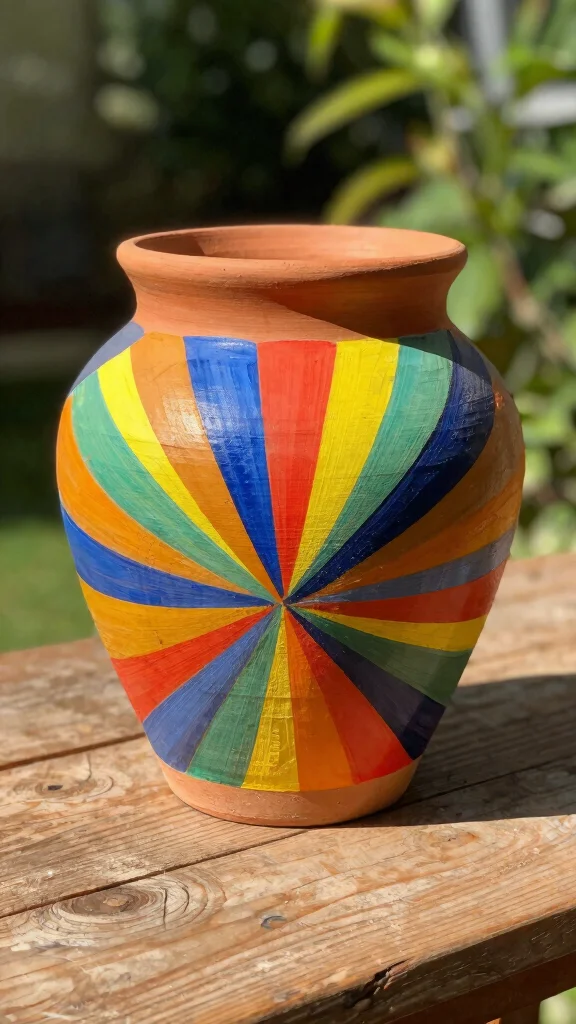
Bright geometric patterns can transform ordinary flower pots into vibrant statement pieces. With bold colors and sharp lines, this modern design approach adds a lively touch to your garden, making it perfect for contemporary homes or eclectic spaces.
Gather smooth clay pots and choose bright acrylic paints in colors like teal, fuchsia, and yellow to get started. Using painter’s tape ensures clean lines for your geometric shapes, creating a striking visual effect. This playful style brings joy and energy to your outdoor area, allowing your personality to shine through.
Try these steps for your geometric pots:
– Apply a light base coat as a foundation
– Use painter’s tape to create desired shapes
– Paint each section in contrasting bright colors
This fun and eye-catching approach will surely brighten any garden corner, making it a delightful space to enjoy.
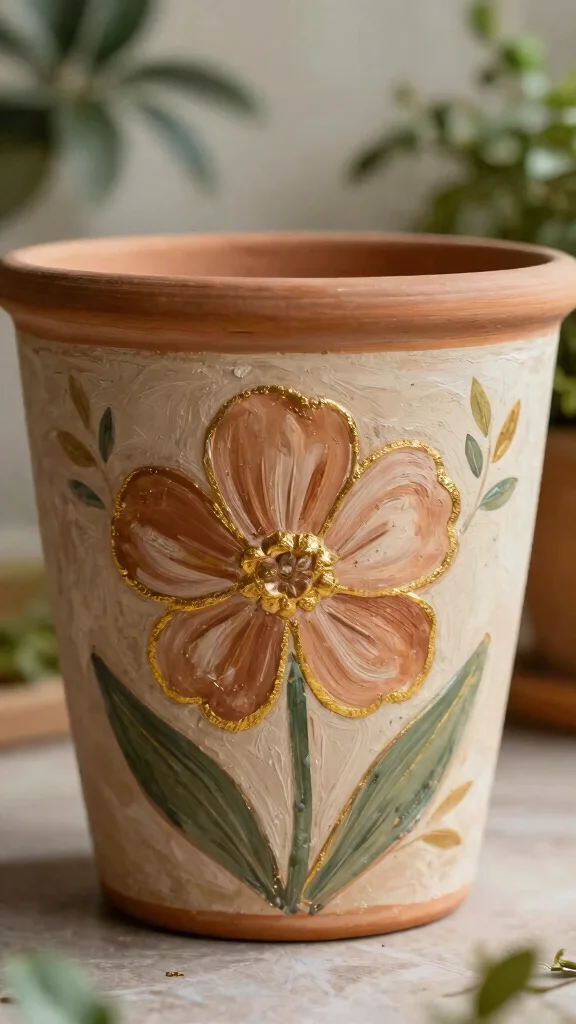
4. Vintage Floral Pot
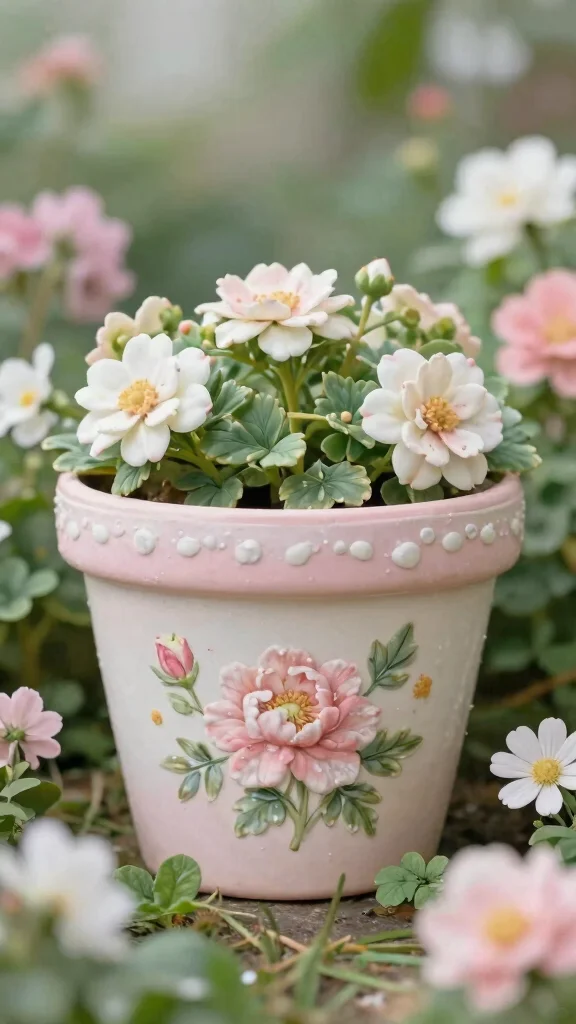
Embrace vintage elegance with flower pots adorned in delicate floral designs reminiscent of classic porcelain. Soft pastels and intricate patterns evoke a timeless charm, perfect for those who appreciate a romantic garden aesthetic.
To create your vintage floral pot, gather terracotta pots and soft pastel acrylic paints. Using a fine-tipped brush allows for detailed artwork, enabling you to paint small flowers and vines that breathe life into your pots. This timeless design creates a sense of nostalgia and beauty in your outdoor spaces.
Consider these ideas for your vintage floral pots:
– Paint a soft base color for a delicate backdrop
– Use a fine brush for intricate flower details
– Add white or cream accents to enhance floral designs
These charming pots will beautifully showcase herbs or delicate blooms, adding a romantic touch to your garden.
How To Choose The Right Materials for Your Painted Flower Pots
When it comes to creating stunning painted flower pots, selecting the right materials is key. Your choice can determine the look, durability, and functionality of your pots. Here’s how to make the best selection:
1. Material Type
Choose between clay, plastic, or metal pots. Clay pots are porous and allow for air circulation, perfect for plants that thrive on minimal watering. Plastic pots are lightweight and can come in various colors, while metal pots add an industrial aesthetic. Assess what works best for your plants and style.
2. Size Matters
Consider the size of the pot based on the type of plants you want to grow. Small plants need smaller pots, while larger plants require more space for root growth. A good rule of thumb is to ensure the pot is at least one size up from the nursery pot your plant originally came in.
3. Drainage Features
Proper drainage is crucial to prevent overwatering. Look for pots that have drainage holes at the bottom or consider drilling your own if you’re using a pot that doesn’t. This prevents root rot and keeps your plants healthy. Without adequate drainage, even the prettiest pot can compromise your gardening efforts.
4. Surface Texture
The texture of your pot’s surface can affect how well paint adheres. Smooth surfaces are easier to paint but can chip easily. Textured surfaces can create interesting designs, but they require more effort to achieve a clean look. Choose a texture that fits your artistic vision and painting technique.
5. Eco-Friendly Options
If you’re committed to sustainability, consider upcycled materials. Old containers, tin cans, or even glass jars can make creative and unique pots. Not only do they reduce waste, but they also add character to your garden. Just ensure they are cleaned properly and have drainage options.
6. Budget Considerations
Your budget can also influence your choice. Decorative pots can vary in price dramatically. Set a budget before shopping to avoid overspending. Remember, you can often find affordable options at thrift stores or during sales, allowing you to combine quality with cost-effectiveness.
Pro Tip: Always do a quick internet search for local thrift stores or garage sales. You might find hidden gems for your painted flower pots that can save you a lot of money and provide an excellent canvas for your creativity! 🌱💡
5. Whimsical Critters
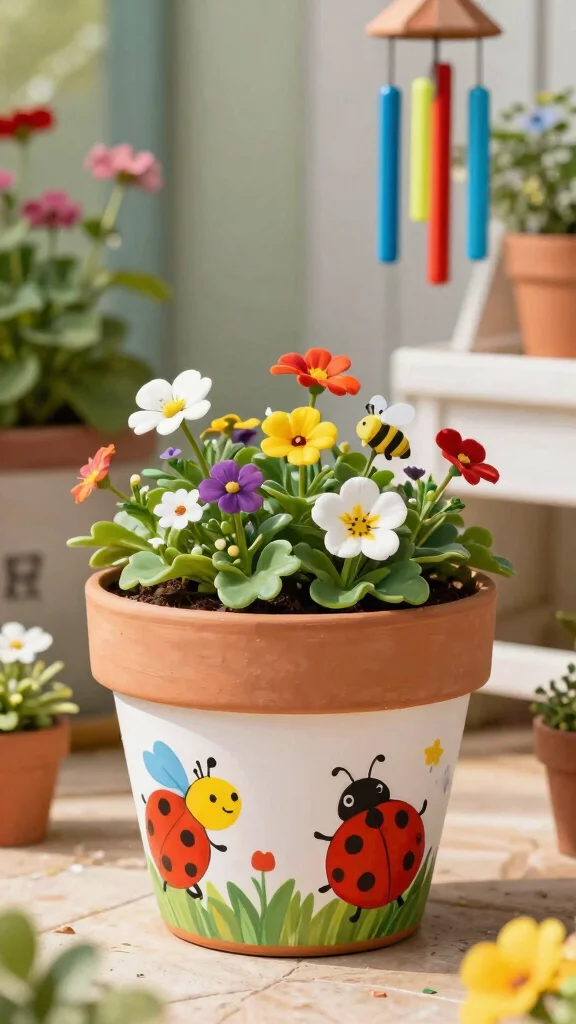
Unleash your creativity by painting flower pots with fun critter designs! From ladybugs to cute frogs, these whimsical pots can add a cheerful touch to any garden or patio. Kids will adore these playful creations, making gardening an exciting adventure.
Gather clay pots and bright acrylic paints for this fun project. After prepping your pot with a base coat, sketch your critter designs lightly with a pencil. Use vibrant colors to fill in the sketches, and consider adding a sprinkle of glitter for a magical finish. This delightful approach brings joy and laughter to your gardening experience.
Here’s how to create your whimsical critter pots:
– Sketch critter designs with pencil on the pot
– Fill in designs with bright acrylic paints
– Add glitter for an enchanting touch
These charming pots will surely bring smiles and spark joy, making your garden a vibrant and lively space.
Did you know that whimsical critter pots boost kid-friendly creativity in about 25 minutes per project? With these painted flower pots ideas, plain pots become charming garden companions through a base coat, pencil sketch, and bright colors.
6. Chalkboard Paint Pots

Chalkboard paint pots combine practicality with creativity, allowing you to label plants or express your artistic flair. Available in classic black or vibrant hues, these pots can brighten your garden while serving a functional purpose.
To create your chalkboard pots, you’ll need terracotta pots, chalkboard paint, and chalk for labeling. After applying a couple of coats of chalkboard paint, let them dry completely before writing the names of your plants or doodling fun designs. This versatile idea allows for easy updates, perfect for seasonal plants or changing gardens.
Follow these steps for unique chalkboard pots:
– Apply several coats of chalkboard paint to terracotta pots
– Use chalk to label plants or create designs
– Erase and change labels as needed
This practical yet artistic approach enhances your gardening experience, blending function with creativity beautifully.
7. Ombre Effect Pots
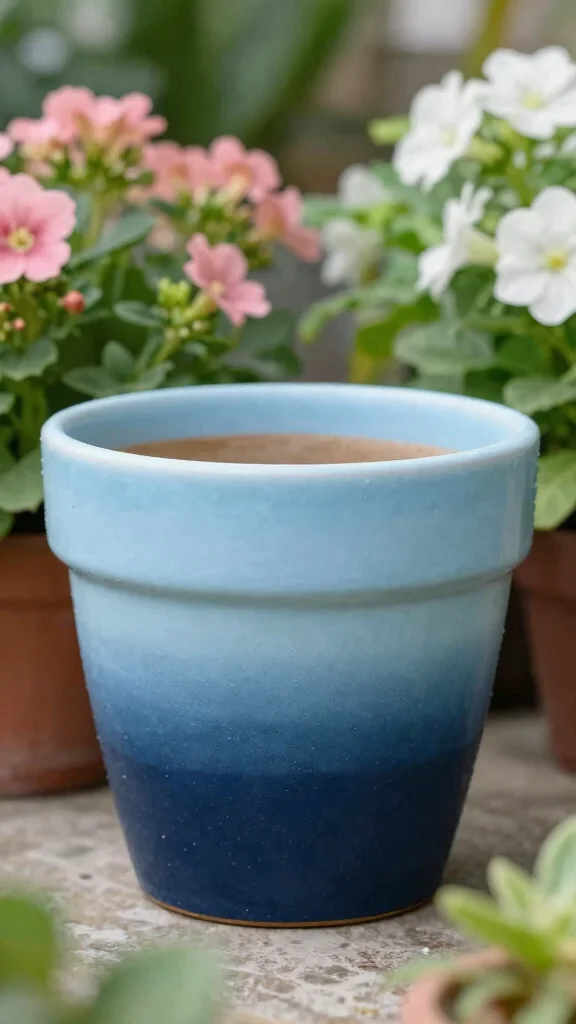
The ombre effect adds a trendy and visually stunning touch to flower pots. By blending gradients of color, these pots transition beautifully from light to dark, creating a captivating visual display.
To achieve this look, choose two or three complementary colors and use a sponge or brush for blending. Start by applying a base coat and allowing it to dry. Then, apply your second color at the bottom and blend upward to create a smooth gradient. Using a third color for further blending enhances the depth and dimension of your design.
Here’s how to create your ombre pots:
– Select two or three related colors for blending
– Use a sponge or brush to create the ombre effect
– Layer colors for added dimension
Your ombre pots will undoubtedly add sophistication to your garden, making them a striking focal point.
8. Striped Delight
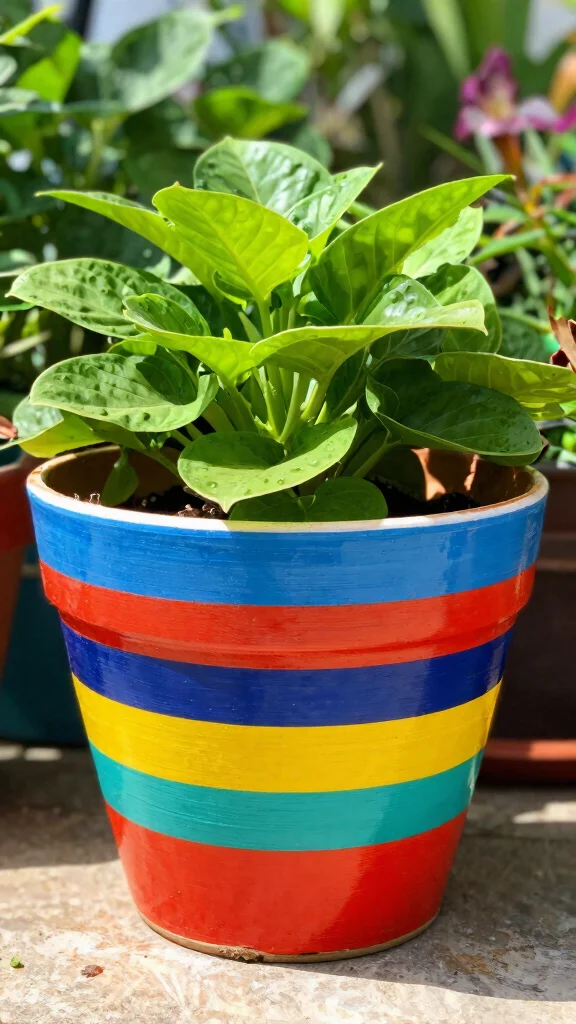
Bold stripes can transform a simple flower pot into a vibrant focal point! Alternating colors in vertical or horizontal lines adds a playful and modern vibe to your gardening.
To create your striped masterpiece, gather terracotta or clay pots, acrylic paints in a variety of colors, and painter’s tape for precision. After applying your base coat and letting it dry, use painter’s tape to section off your stripes. Choose contrasting colors for each stripe to make them stand out. This cheerful design is perfect for adding a pop of color to your garden.
Consider these steps for your striped delight pots:
– Apply a base coat and let it dry completely
– Use painter’s tape to create stripe sections
– Paint in contrasting colors for visual impact
This bright and eye-catching design will enhance your garden and bring a fun, stylish look to your outdoor space.
9. Artistic Drip Pots
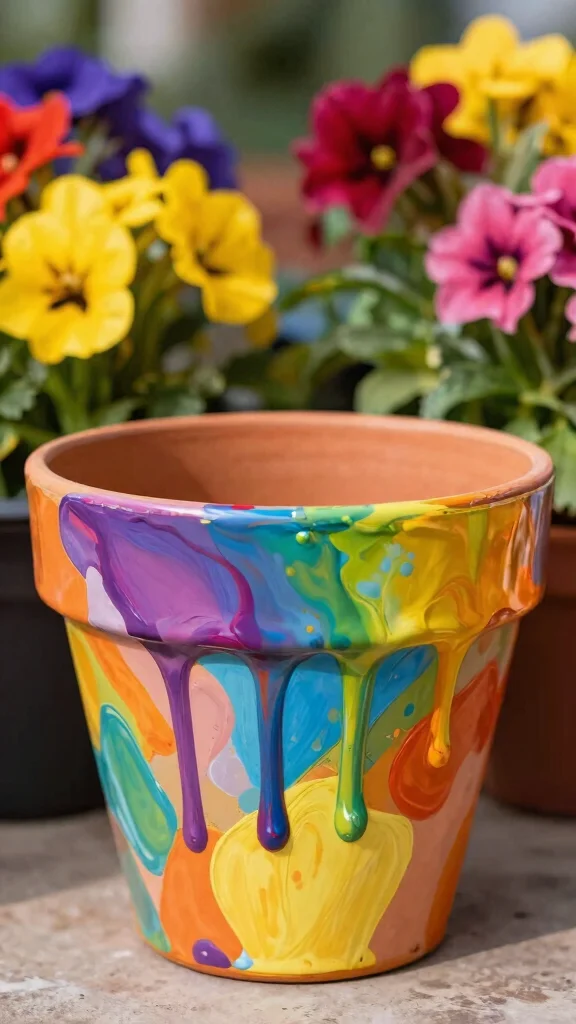
For an artsy and abstract flair, try creating drip pots! This technique involves pouring or dripping paint to form a free-flowing design. It’s perfect for those who love to express their creativity in unique ways.
To get started, you’ll need plain terracotta pots, various paint colors, and a container for excess paint. Hold the pot at an angle while allowing paint to drip from the top. Layer different colors to achieve a one-of-a-kind effect. This style results in striking pots that stand out in any garden.
Here’s how to create your artistic drip pots:
– Angle the pot to allow paint to drip down
– Use multiple colors for a layered appearance
– Experiment with different pouring techniques
Your artistic drip pots will showcase bold flowers or succulents beautifully, adding a creative touch to your garden.
Fun fact: with just 3 colors and one tilted pour, you can craft a drip pot in under 15 minutes. Keep layering, and your painted flower pots ideas become a bold, one-of-a-kind piece of garden art.
10. Mosaic Tile Effect
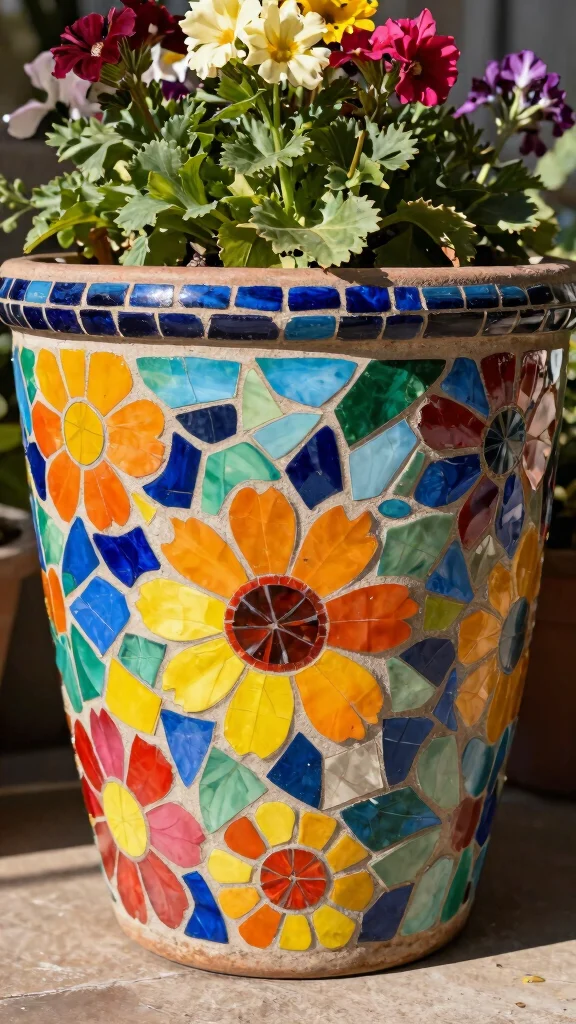
Creating a mosaic tile effect can turn any plain pot into a colorful masterpiece. This fun project allows for endless creativity with painted segments, making it a rewarding endeavor for any DIY enthusiast.
To start, gather terracotta pots, assorted paint colors, and a small brush for detailed work. Apply a base coat and let it dry. Then, use a brush to paint small squares or geometric shapes in your chosen colors. Once complete, sealing the design with a clear varnish protects your work while enhancing its longevity.
Consider these steps for your mosaic tile effect pots:
– Apply a base coat and let it dry completely
– Paint small geometric shapes in various colors
– Seal with a clear varnish for protection
Your mosaic pots will bring a festive touch to your garden, perfect for summer gatherings and celebrations.
11. Seasonal Theme Pots

Celebrate the seasons with themed flower pots that reflect the beauty of nature year-round! From pumpkins for autumn to snowflakes for winter, the design possibilities are endless, allowing you to express your creativity with each season.
Gather various terracotta pots and seasonal paint colors like orange, white, or pastels. Choose a theme for each pot, paint the base color, and use stencils or freehand designs to depict seasonal motifs. This approach keeps your garden fresh and exciting, making every season a celebration of creativity.
Here are some ideas for your seasonal theme pots:
– Choose seasonal motifs to paint on pots
– Use stencils for precise designs
– Change themes to reflect holidays or seasons
Your seasonal theme pots will bring joy and vibrancy to your garden, creating a delightful display throughout the year.
12. Personalization with Handwritten Quotes
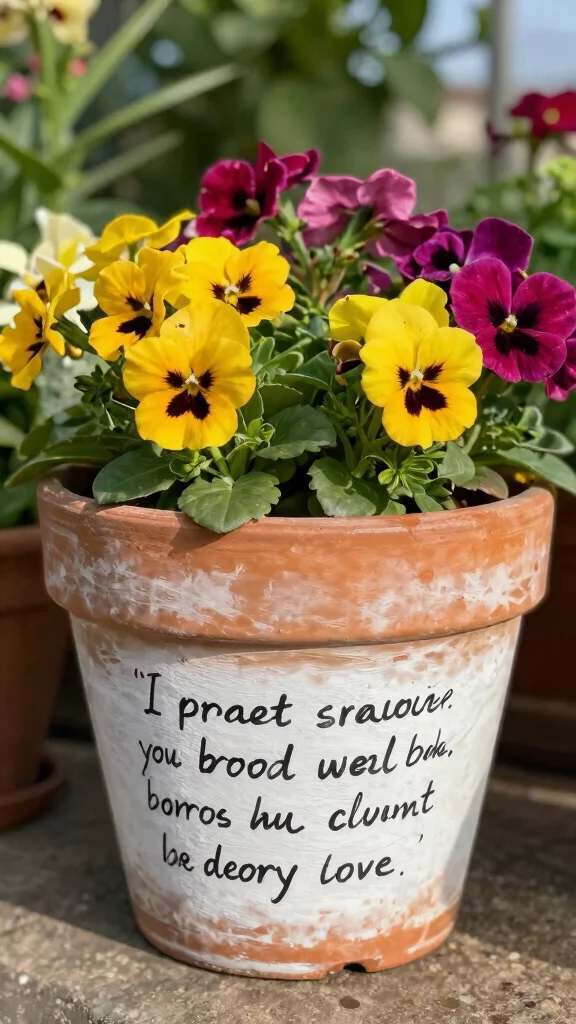
Add a personal touch to your garden by incorporating inspiring quotes or phrases on your flower pots! This creative idea combines artistry with motivation, making your garden not just beautiful but also uplifting.
To create your personalized pots, you’ll need clay pots, permanent markers or paint, and a steady hand for writing. After painting your pot with a design of your choice, use a permanent marker to inscribe your favorite quote or saying. This unique touch adds warmth and charm, making your garden a source of inspiration for you and others.
Consider these steps for adding handwritten quotes:
– Paint your pot with a design you love
– Use a permanent marker for clear writing
– Choose quotes that resonate with you
Your personalized pots will make wonderful gifts or serve as delightful enhancements to your own green space, bringing joy and inspiration to your gardening experience.
Handwritten quotes turn plain pots into personal garden companions—perfect for painted flower pots ideas. Pro tip: sketch your design first, use a permanent marker or paint, and seal with a clear topcoat so your words stay bright all season.
Conclusion
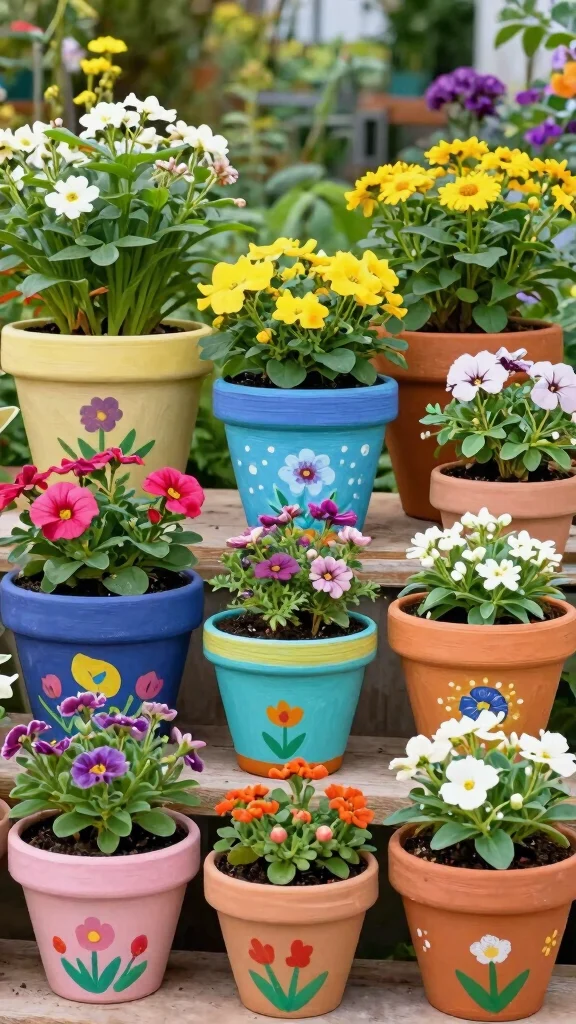
Painting flower pots is a delightful way to infuse creativity into your gardening. Each of these 12 ideas allows you to express your style while also recycling and upcycling materials you already have. Whether you’re a seasoned gardener or just starting out, these painted flower pot ideas can bring a joyous vibe to your garden.
So grab your paintbrushes and let your imagination flow! Share your creations and enjoy watching your plants thrive in their new artistic homes.
Note: We aim to provide accurate product links, but some may occasionally expire or become unavailable. If this happens, please search directly on Amazon for the product or a suitable alternative.
This post contains Amazon affiliate links, meaning we may earn a small commission if you purchase through our links, at no extra cost to you.
Frequently Asked Questions
What are the easiest upcycled materials to use for painted flower pots ideas?
You can start with upcycled garden pots like terracotta pots, metal tins, wooden crates, or glass jars. First clean and dry, then sand rough edges and apply a primer suited to the surface. Use outdoor acrylic paints for durability, and seal with a weatherproof topcoat. This approach makes painted flower pots ideas feel accessible and fits perfectly with upcycled garden pots and creative planter ideas.
How can I achieve decorative pot painting with a DIY flower pot designs approach?
Start with a cohesive theme (botanical, geometric, nautical, etc.), then prep the surface with cleaning and light sanding. Use painter’s tape or stencils for clean lines, apply a base color, add patterns or silhouettes, and finish with a protective sealant. This is at the heart of decorative pot painting and DIY flower pot designs for a personal touch that still lasts outdoors.
What are some beginner-friendly creative planter ideas using painted pots?
Try color-blocked pots for a bold start, geometric patterns with tape for precision, botanical silhouettes for a soft look, or a mosaic twist using broken ceramic pieces. You can also create a mini outdoor gallery by painting a set of pots in a cohesive color family. These ideas align with creative planter ideas and painted flower pots ideas for beginners and beyond.
What paints and sealants are best for outdoor upcycled garden pots?
Choose exterior-grade paints such as outdoor acrylics or chalk paint with a UV-friendly topcoat. Use a suitable primer for the pot material, then seal with a weatherproof finish like polycrylic or epoxy topcoat. This keeps your decorative pot painting looking fresh in real-world conditions and supports long-lasting upcycled garden pots projects.
How do I care for painted flower pots to keep them vibrant in an outdoor garden?
Clean with a mild soapy water solution and avoid harsh chemicals that can wear the paint. Re-seal or reapply a protective topcoat every growing season, especially on pots exposed to sun and rain. Move delicate pieces indoors during extreme weather if possible, and rotate plants to minimize weight and moisture stress. With these steps, your artistic gardening projects and painted flower pots ideas stay vibrant season after season.
Related Topics
painted flower pots ideas
decorative pot painting
DIY flower pot designs
upcycled garden pots
creative planter ideas
artistic gardening projects
beginner friendly
easy DIY
seasonal decor
budget friendly
garden crafts
eco-friendly gardening