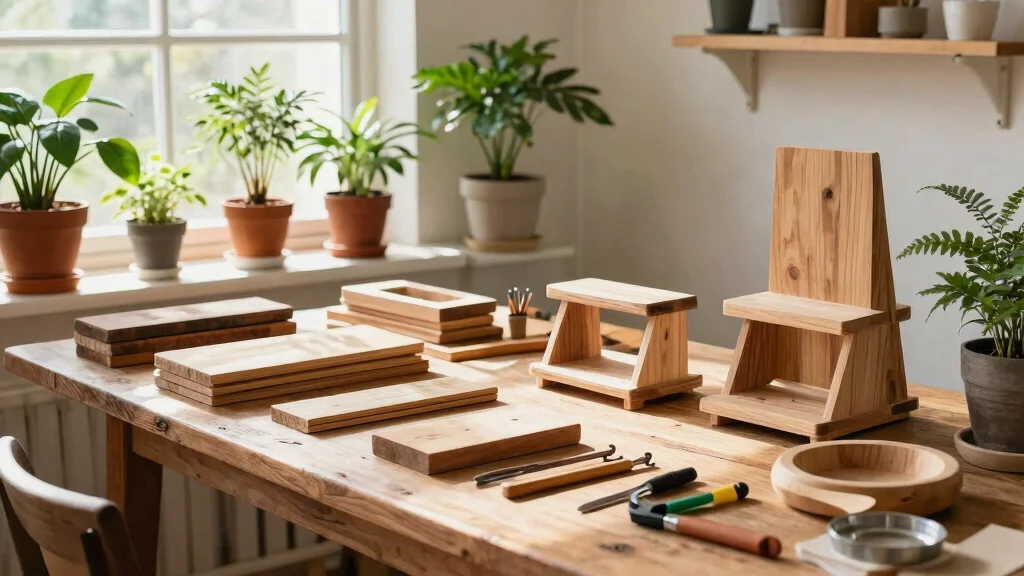
Creating a cozy indoor space filled with vibrant plants can be incredibly rewarding. This weekend, why not take it a step further and craft your own indoor plant stand? I made this post because I believe that everyone should have the opportunity to showcase their plants beautifully without breaking the bank. With a little creativity and some upcycled materials, you can build a stunning plant stand that fits perfectly in your home.
If you’re someone who loves indoor gardening or wants to enhance your DIY home decor, you’ve landed in the right place. This post is for budget-conscious gardeners and crafty souls eager to add personal touches to their living spaces. Each of the 12 plant stand ideas I’ve gathered is not only stylish but also wallet-friendly and straightforward enough to tackle over a weekend.
What can you expect from this guide? You’ll find a variety of plant display ideas, all centered around using materials you might already have at home. Whether you’re a seasoned DIY-er or trying your hand at crafting for the first time, these homemade plant stand projects will give your indoor plants the attention they deserve. Plus, you’ll feel great knowing you created something unique and functional!
Key Takeaways
– Discover 12 budget-friendly plant stand ideas that can transform your indoor gardening space with style and flair.
– Learn how to repurpose materials like wooden pallets, vintage suitcases, and even cinder blocks to create stunning displays.
– Each DIY project is designed to be simple enough for beginners while still offering creative challenges for more experienced crafters.
– Enjoy the satisfaction of making your own plant stand, adding a personal touch to your home decor while showcasing your favorite plants.
– Get inspired to embrace upcycled materials, making your indoor gardening projects eco-friendly and cost-effective.
1. Upcycled Wooden Pallet Stand
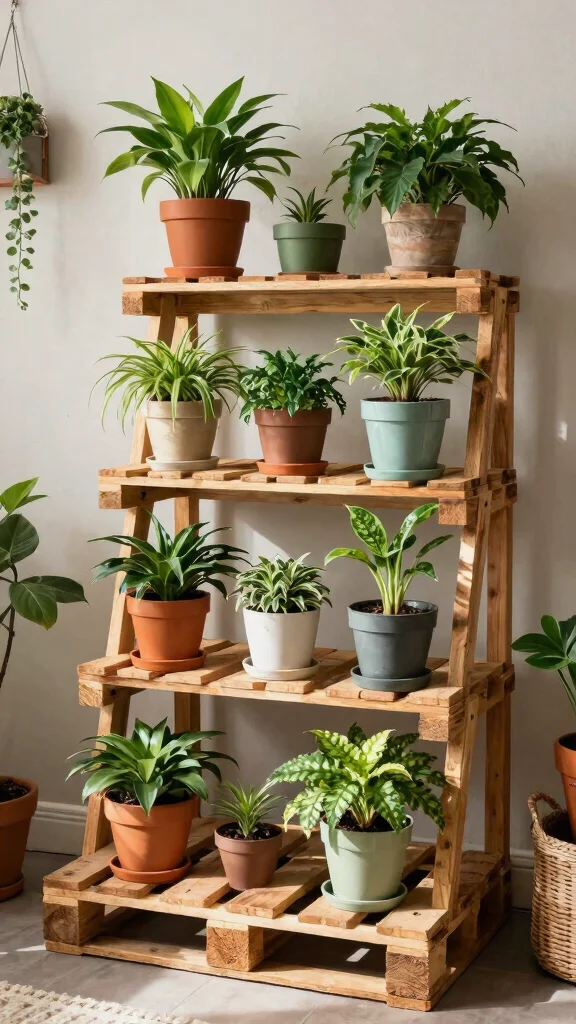
Old wooden pallets are a treasure for DIY enthusiasts! They are robust, adaptable, and infuse a rustic style into your indoor garden. Start by breaking down a pallet and smoothing any rough edges to prevent splinters. You can choose to paint it or keep the natural look to match your home decor. For a tall stand, stack two pallets; for a low display, use one pallet only.
Begin by determining how you want to use the pallets and gather your materials. Focus on the aesthetic—whether rustic or polished—and create a design that fits your space. This project not only enhances your decor but also gives your plants a cozy home.
Key materials to gather:
– 1 sturdy wooden pallet
– Sandpaper for smoothing edges
– Optional: Paint or wood stain for finishing
– Screws for secure assembly
Steps to create your stand:
1. Carefully dismantle the pallet using a pry bar.
2. Sand down all surfaces and edges thoroughly.
3. If desired, apply paint or stain and let it dry.
4. Reassemble the pallets into your preferred design.
5. Use screws to ensure stability and safety.
This DIY project offers a charming way to display your indoor plants. You’ll enjoy a unique, personalized touch in your home garden.
2. Ladder Plant Stand
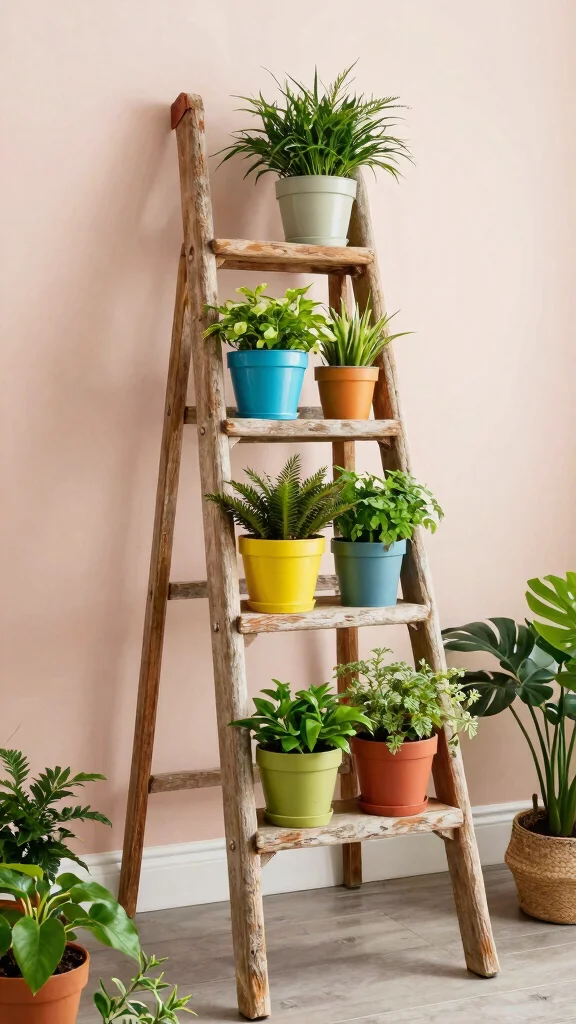
Have an old ladder collecting dust? Turn it into a stylish plant stand with minimal effort! Lean the ladder against a wall and use the rungs to showcase your favorite potted plants. This simple idea not only saves space but also introduces a delightful vertical element to your indoor greenery.
First, clean the ladder to ensure it’s ready for use. If you want a splash of color, consider painting it to suit your style. Position it securely against a wall and start arranging your plants for a visually appealing display.
Essential items to prepare:
– A wooden ladder, preferably lightweight
– Your collection of potted plants
– Optional: Decorative paint or fabric for flair
Steps to create your stand:
1. Clean the ladder and sand if necessary.
2. Paint or embellish the ladder for a personal touch.
3. Lean it against a wall or in a corner for support.
4. Arrange your plants on the rungs, mixing sizes and colors for interest.
This easy project not only beautifies your space but also provides a practical solution for plant displays in smaller areas.
Difficulty Rating & Requirements
Overall Difficulty Rating: Medium
Building your own indoor plant stands can be a fun and rewarding weekend project. While some designs are straightforward, others may require a bit more creativity and skill. This rating suits anyone from beginner DIYers to those with some experience in crafting. If you’re comfortable using basic tools and following instructions, you’ll do just fine!
Time Estimate:
⏱ Estimated time: 3 to 6 hours
The total time largely depends on the complexity of the stand you choose. Here’s a rough breakdown:
– Planning & Gathering Materials: 1 hour
– Building Phase: 2 to 4 hours (depending on design)
– Finishing Touches (like painting or staining): 1 hour
Skill Requirements:
– Required skills: Basic woodworking, measuring, and painting
– Beginner-friendly: Yes! You can learn many skills along the way.
– Skills that can be learned include basic measuring and cutting techniques, while more advanced skills, like using power tools, may require prior experience.
Tools & Materials Needed:
🧰 Essential items checklist:
– Saw (hand saw or jigsaw) – Required
– Measuring tape – Required
– Screwdriver or drill – Required
– Sandpaper – Required
– Wood glue or screws – Required
– Paint or wood finish – Optional
– Clamps – Optional
– Safety goggles – Required
Step-by-Step Overview:
1. Planning Your Design: 30 minutes
Choose from one of the 12 DIY plant stands. Sketch your design and make a list of materials.
2. Gathering Materials: 1 hour
Visit your local hardware store or check your garage for upcycled materials. You might find old crates, pallets, or even cinder blocks!
3. Building the Stand: 1.5 to 3 hours
Follow your plan, measure twice, and cut once. Use screws or glue to assemble your stand. Be patient and take your time to ensure stability.
4. Finishing Touches: 1 hour
Sand any rough edges and apply paint or stain if desired. Let it dry completely before placing your plants on it.
Professional vs DIY:
Hiring a professional to create a custom plant stand can cost anywhere from $100 to $500, depending on the design and materials. By tackling this project yourself, you can create a unique plant stand for less than $50, depending on the materials you use. If you’re looking for a budget-friendly option and enjoy hands-on projects, a DIY plant stand is the way to go!
3. Cinder Block Planter
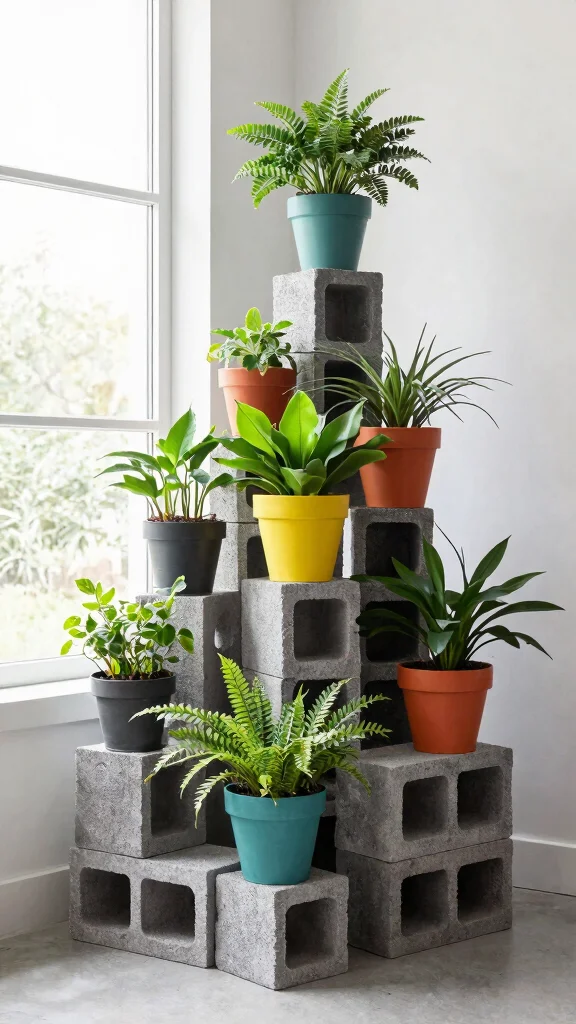
Cinder blocks are surprisingly versatile for DIY enthusiasts! With a little creativity, you can turn them into modern, eye-catching plant stands. Stack the blocks in unique arrangements to suit your space, fill the holes with soil for planting directly, or place pots on top for an elevated look.
Decide how you want to display the cinder blocks and gather your plants. Experiment with different arrangements to create a design that reflects your personal style and enhances your indoor garden.
What you’ll need:
– 4 to 8 cinder blocks
– Potting soil if planting directly
– Small pots if using pots
Follow these steps to build your stand:
1. Choose your arrangement for stacking the blocks.
2. Fill the holes with soil if planting directly, or place pots on top.
3. Water your plants as needed.
Adding a splash of color by painting the cinder blocks can elevate the overall aesthetic. Incorporate trailing plants for a beautiful cascading effect that brings life to your space.
Fun fact: A DIY plant stand indoors can start with 4-6 cinder blocks stacked in geometric layouts. Build your plant stand diy indoor project for under $10, and fill holes with soil or prop pots on top for an elevated vibe.
4. Vintage Suitcase Stand

Revive that forgotten suitcase by transforming it into a quirky plant stand! You can either open it up to showcase your plants inside or use it as a unique surface for pots. This vintage approach adds character and charm to your indoor garden.
Start by cleaning the suitcase and consider painting or decorating it for extra flair. Decide whether you want to display plants on top or inside, and arrange them creatively for a stunning visual effect.
Items you’ll need:
– An old suitcase in good condition
– Potted plants of various sizes
– Optional: Decorative liners like fabric or paper
Here’s how to create your stand:
1. Clean the suitcase and apply any desired paint or decoration.
2. Place pots on top for display or fill the inside with soil.
3. Arrange your plants as you like.
This charming project not only showcases your plants but also adds a nostalgic touch to your decor, making it a delightful conversation starter.
5. PVC Pipe Stand
Get creative with PVC pipes to craft a modern plant stand! This project offers a sleek, industrial feel to your space. Cut the pipes into various lengths and assemble them into geometric shapes that can serve as unique displays for your plants.
Choose your design and gather the necessary materials. The clean lines and customizable shapes make this an exciting project that allows you to create something truly unique.
Materials needed:
– PVC pipes, 1-2 inches in diameter
– A PVC pipe cutter for precise cuts
– Optional: Paint or decorative stickers
Steps to create your stand:
1. Cut pipes into different lengths for variety in height.
2. Assemble the pieces into your desired geometric design.
3. Paint or customize the stand if desired.
4. Set your pots on the top and side platforms.
This lightweight stand is easy to move and adjust, allowing you to refresh your indoor space effortlessly.
6. Crate Plant Stand
Wooden crates are a classic and stylish choice for DIY plant stands! Stack them for height or use a single crate for a charming low display. They add a rustic feel that enhances any indoor plant collection beautifully.
Start by preparing the crates and deciding how you want to use them. Whether stacked or standalone, they provide a lovely way to show off your plants while adding character to your space.
What you’ll need:
– 1 to 2 wooden crates
– Sandpaper for smoothing rough edges
– Optional: Paint or stain for finishing touches
Creating your stand is simple:
1. Sand down any rough areas on the crate.
2. Apply paint or stain if desired, allowing it to dry.
3. Stack the crates for height or use one for a flat display.
4. Fill with plants and enjoy the aesthetic!
Consider lining the inside of the crate with decorative fabric or paper for an added touch. Varying crate sizes can create a visually appealing layered effect.
Fun fact: two wooden crates can replace a pricey stand, cutting costs by up to 60% for your indoor plant display. Stack them for height, or go single-crate charm—it’s a plant stand diy indoor win with big impact.
7. Repurposed Bookshelf
Have an old bookshelf that’s no longer in use? Give it a new life as a stunning plant display! Remove shelves if necessary, paint it in a color that complements your home, and arrange your plants by size and style for a beautiful showcase.
Start by cleaning the bookshelf and planning your design. This project allows you to mix practicality with creativity, letting your plants shine in a fresh way.
Gather these materials:
– An old bookshelf ready for transformation
– Optional: Paint for a fresh look
– A variety of plants in different sizes
Follow these steps to create your stand:
1. Remove unnecessary shelves and clean the bookshelf thoroughly.
2. Paint in your preferred color if desired.
3. Arrange your plants, mixing large and small varieties for depth.
Add decorative books or trinkets to fill in gaps and add interest. This versatile project allows your creativity to flourish while showcasing your plant collection beautifully.
8. Barrel Planter Stand
Turn an old barrel into a rustic plant stand with a simple cut! Halve the barrel to create two charming planters that can be placed on the floor or elevated. This method brings a countryside vibe to your indoor gardening space.
Start by safely cutting the barrel in half and preparing it for planting. This project adds a unique touch to your decor and provides plenty of space for your favorite plants.
Materials you’ll need:
– An old barrel in good condition
– Potting soil for planting
– A selection of your favorite plants
Steps to create your stand:
1. Cut the barrel in half carefully, ensuring safety.
2. Sand the edges if needed to avoid splinters.
3. Fill each half with potting soil and plant your greenery.
4. Position them around your home for an attractive display.
Using a barrel with character adds personality. Mix different plants for a lush, layered look that enhances your indoor space.
9. Towel Rack Stand
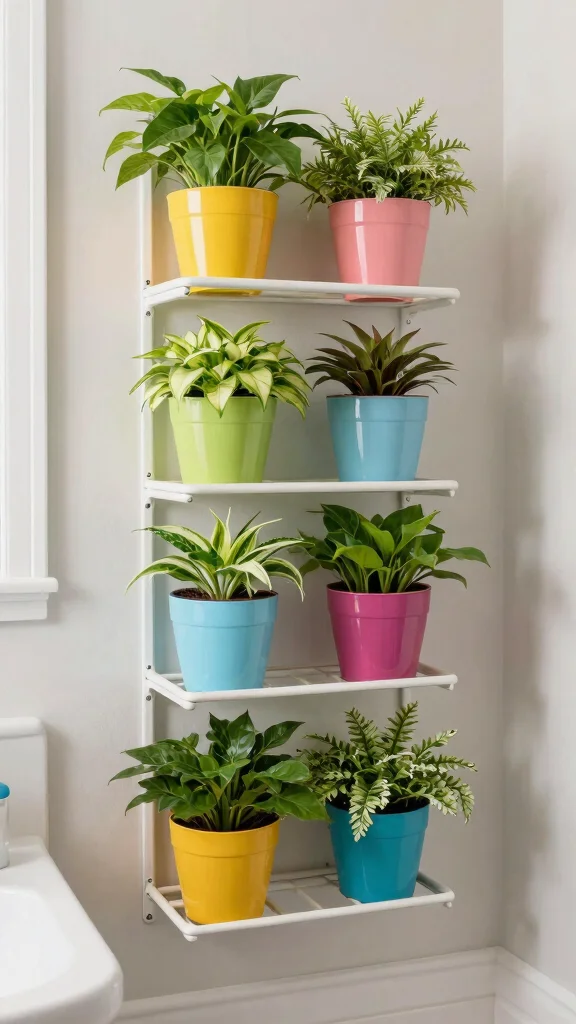
An unused towel rack can be transformed into a stylish plant stand! Hang pots from the bars or place lightweight plants on the rack, adding a unique element to your indoor space. This project is especially great for small bathrooms or kitchens.
Begin by cleaning the towel rack and consider painting it to match your interior decor. This simple transformation optimizes space while showcasing your plants beautifully.
Key materials to have:
– An old towel rack you no longer use
– Hanging pots or lightweight plants
Steps to create your stand:
1. Clean the towel rack thoroughly to prepare it.
2. Paint if desired to coordinate with your decor.
3. Hang pots from the rack or place lightweight plants on the bars.
Add colorful pots for a fun pop of color. Small hooks on the side can provide extra hanging options, making this project both functional and decorative.
10. Industrial Pipe Stand
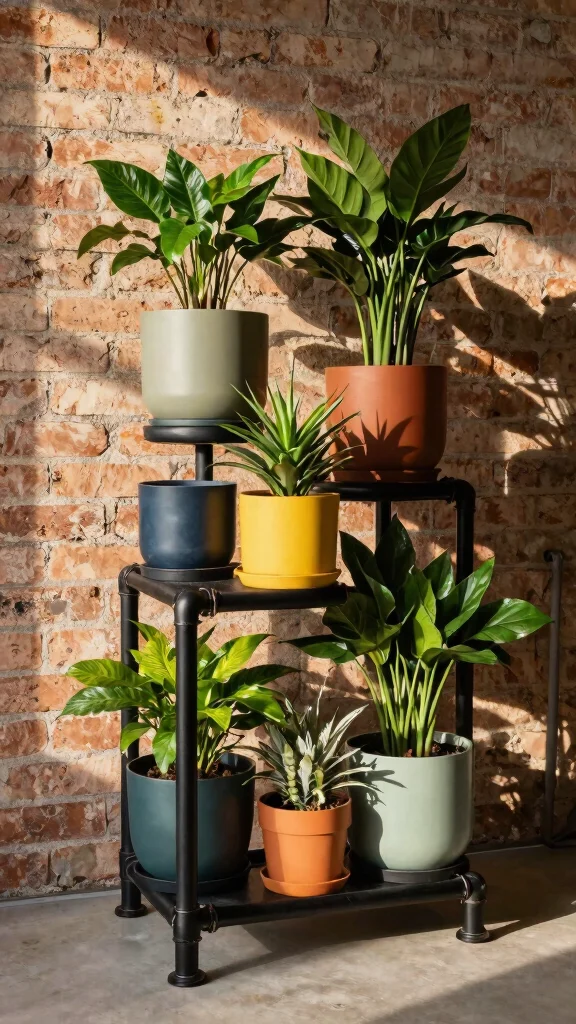
Create an edgy plant stand using industrial pipes! This project adds a contemporary vibe to your indoor garden while providing a strong base for your plants. Arrange the pipes in a configuration that complements your decor style.
Gather your materials and decide on a design that showcases your unique style. The sturdy construction ensures your plants are displayed securely while looking stylish.
Materials you will need:
– Industrial pipes in various lengths
– Flanges for secure assembly
– Pots or plants for display
Steps to create your stand:
1. Assemble the pipes and flanges according to your design.
2. Secure the pipes tightly; a wrench can help with this.
3. Place your pots on the pipes, adjusting as necessary.
Consider painting the pipes to match your style, or leave them raw for a more rustic look. This stand works beautifully in minimalist decor, allowing your plants to stand out.
Fun fact: DIY plant stands built from upcycled pipes cost up to 70% less than store-bought options, and they can be tuned to your space in under an afternoon. Turn salvaged parts into a sturdy plant stand diy indoor that sparks conversation.
11. Hanging Plant Stand
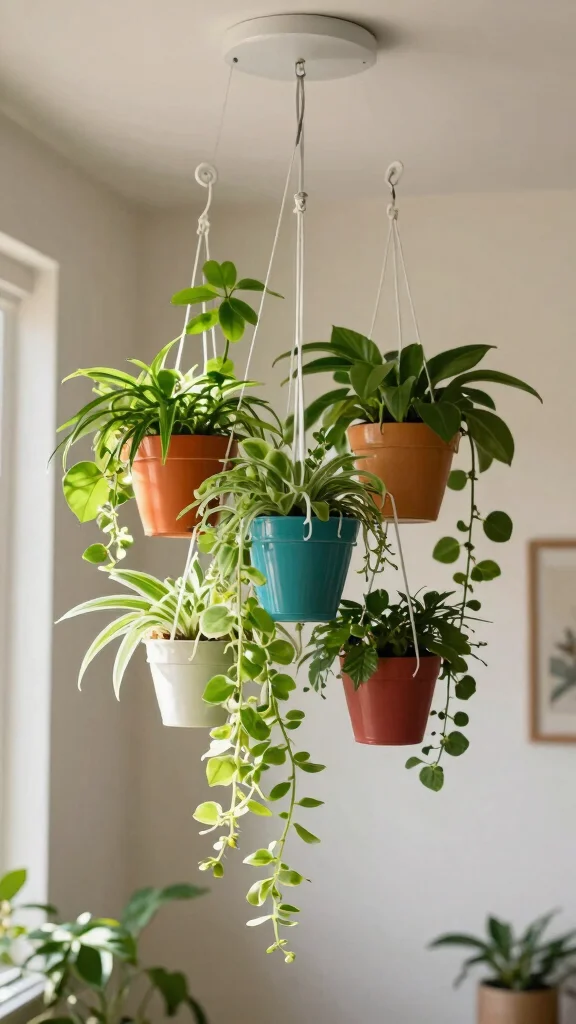
Make a stunning hanging plant stand using macrame or simple ceiling hooks! This project adds vertical interest to your space and saves floor area, making it perfect for smaller homes. Create a dynamic display with a mix of hanging pots.
Start by deciding if you want to use macrame or hooks, then gather your materials. This unique design elevates your indoor greenery while enhancing your decor.
What you’ll need:
– Macrame cord or hooks for hanging
– Various planters for display
Steps to create your stand:
1. If using macrame, create knots to form holders for your pots.
2. If using hooks, install them in the ceiling at your desired height.
3. Hang your planters and arrange them creatively.
Mixing materials can create a unique look; consider pairing ceramic pots with glass hangers for a trendy contrast. This stand is ideal for trailing plants, creating a lush, green curtain in your home.
12. Wheelbarrow Plant Stand

Transform an old wheelbarrow into a whimsical plant stand! Fill it with soil and your favorite plants, placing it in your living area or patio for a standout feature. This fun project adds character and creativity to any space.
Begin by thoroughly cleaning the wheelbarrow and preparing for planting. This engaging project not only serves a practical purpose but also enhances your outdoor or indoor garden beautifully.
Essential materials:
– An old wheelbarrow in decent shape
– Potting soil for planting
– A selection of plants to fill it
Creating your stand is easy:
1. Clean the wheelbarrow to remove any dirt.
2. Fill it with potting soil, ready for plants.
3. Plant flowers or greenery of your choice.
4. Position the wheelbarrow where it can be admired!
Consider painting the wheelbarrow for a fun flair or leaving it rustic for a more natural look. This project adds charm and creativity to your garden, making it a delightful focal point.
Conclusion

Creating your own plant stands is not just a budget-friendly project, but it’s also a wonderful way to express your creativity. Each of these ideas showcases how everyday items can transform into unique displays for your indoor plants. Whether it’s a vintage suitcase or an industrial pipe stand, let your imagination run wild!
Try out these DIY options this weekend and enhance your indoor gardening experience. Share your creations or let us know which one inspired you the most. Happy planting!
Note: We aim to provide accurate product links, but some may occasionally expire or become unavailable. If this happens, please search directly on Amazon for the product or a suitable alternative.
This post contains Amazon affiliate links, meaning we may earn a small commission if you purchase through our links, at no extra cost to you.
Frequently Asked Questions
What upcycled materials work best for a DIY indoor plant stand?
Wood scraps from pallets or crates are a budget-friendly start for a homemade plant stand. Solid boards, bamboo, or even an old stool can be repurposed into a sturdy stand. Metal pipes and fittings also work for a sleek, plant display ideas with an industrial vibe. Avoid treated lumber indoors due to fumes.
Practical steps: choose a height based on your largest pot, sand and seal the pieces with a non-toxic finish, and assemble with screws or brackets. Add non-slip feet to protect floors. For extra stability, add a diagonal brace or cross-support.
Tip: keep it simple for a quick plant stand diy indoor project you can finish this weekend.
How can I build a simple plant stand this weekend with minimal tools?
To build a simple plant stand this weekend with minimal tools, start with a crate, a thick board, or an old stool. You’ll need basic supplies: wood or metal pieces, a drill, screwdriver, sandpaper, and a sealant.
Quick plan: pick a height that suits your space, cut to size or repurpose the crate, sand edges smooth, join with screws or brackets and good wood glue, and finish with paint, stain, or a clear sealant. Add felt pads or casters for mobility.
Pro tip for budget-friendly projects: use leftover paint, upcycle an old tray as a shelf, and keep the design simple to stay within a tight timeline. You’ll have a homemade plant stand that doubles as DIY home decor for indoor gardening.
What height and design should I choose for indoor plant stands?
Mix heights to create visual interest: consider short stands around 6–12 inches, medium stands 12–18 inches, and tall stands 24–36 inches. Use a combination of widths to accommodate different pots and create a dynamic plant display ideas. For heavy pots, opt for a wide, sturdy base and, if possible, add a cross-brace for extra stability.
If you’re new to indoor gardening, start with 2–3 stands at different heights and adjust as you go. This helps you optimize space without overloading any single stand.
How can I customize plant stands to match my decor on a budget?
Get creative with finishes: paint them in your wall color, stain for a natural look, or apply decals and decoupage with fabric or paper for a unique vibe. Add caster wheels for mobility, or repurpose an old shelving unit into a tiered stand. Finish with a protective seal to keep DIY home decor stylish and durable.
All of these ideas fit well with budget-friendly projects and homemade plant stand concepts, while enhancing your indoor gardening display.
Are DIY plant stands durable enough for heavy pots and safe around kids/pets?
Durability comes from selecting sturdy materials and proper joinery. Use solid wood or metal, add bracing or cross supports, and avoid thin plywood for heavier pots. Ensure a wide, stable base and consider anchoring taller stands to a wall if you have kids or pets roaming nearby. Use non-slip feet or mats to prevent slipping and floor damage.
With thoughtful design and simple safety checks, plant stand diy indoor ideas can be both sturdy and safe for active homes.
Related Topics
plant stand diy indoor
upcycled materials
budget-friendly projects
indoor gardening
homemade plant stand
DIY home decor
weekend projects
easy builds
plant display ideas
sustainable decor
beginner friendly
minimalist design