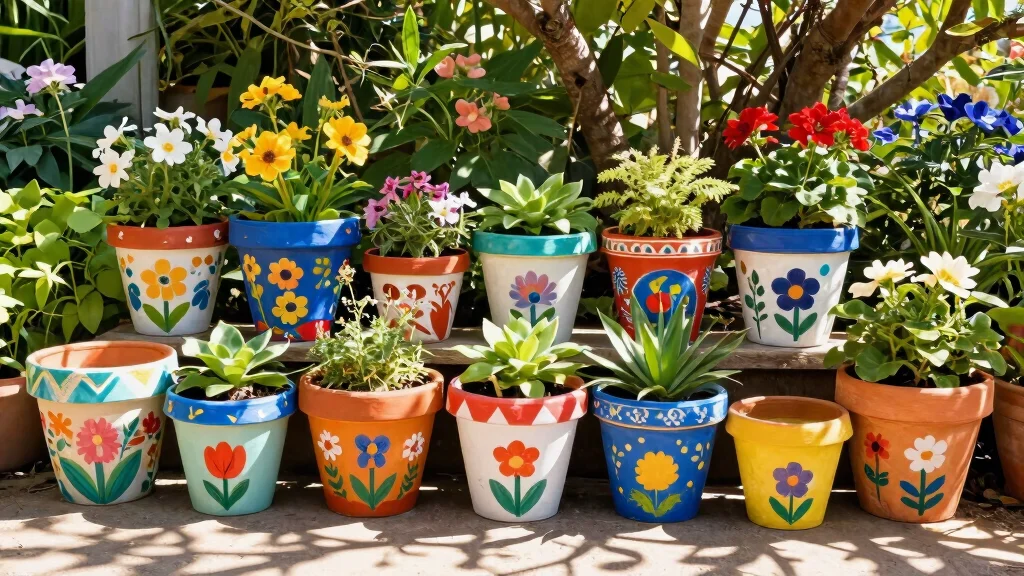
Creating a beautiful garden space is a rewarding endeavor, but it can often feel overwhelming when it comes to finding unique and personalized decor. That’s where this post comes in. I’ve been diving into the world of gardening and searching for ways to spruce up my plant containers. I realized that hand-painted flower pots can truly transform your garden while expressing your unique style. Such creative projects not only add charm to your plants but also allow you to connect with nature on a more personal level.
If you’re someone who loves getting crafty and wants to add a personal touch to your garden, this post is just for you. Whether you’re a seasoned gardener or just starting out, these hand-painted flower pot ideas will inspire you to take your gardening to the next level. You don’t have to be an artist to create something beautiful; all you need is a little creativity and enthusiasm. In this post, I’ve gathered 12 one-of-a-kind designs that are sure to elevate your plant game and make your garden a more inviting space.
Get ready to explore a range of stunning DIY flower pot designs, from rustic and charming to bold and colorful. You’ll find practical tips for each idea, along with painting techniques that will help you create decorative plant containers that reflect your personality. By the end of this guide, you’ll not only have a list of unique gardening projects to tackle but also a newfound inspiration for making your garden uniquely yours.
Key Takeaways
– Discover 12 inspiring hand-painted flower pot designs that fit various styles and tastes, helping you to personalize your gardening space.
– Learn creative pot painting techniques, including stenciling and ombre effects, to enhance your DIY flower pot projects.
– Explore unique gardening projects that incorporate seasonal themes and vintage-inspired pottery for added charm.
– Get practical tips on how to choose colors and materials that complement your plants while showcasing your personality.
– Find out how to turn ordinary containers into extraordinary decorative plant containers, making your garden decor both fun and memorable.
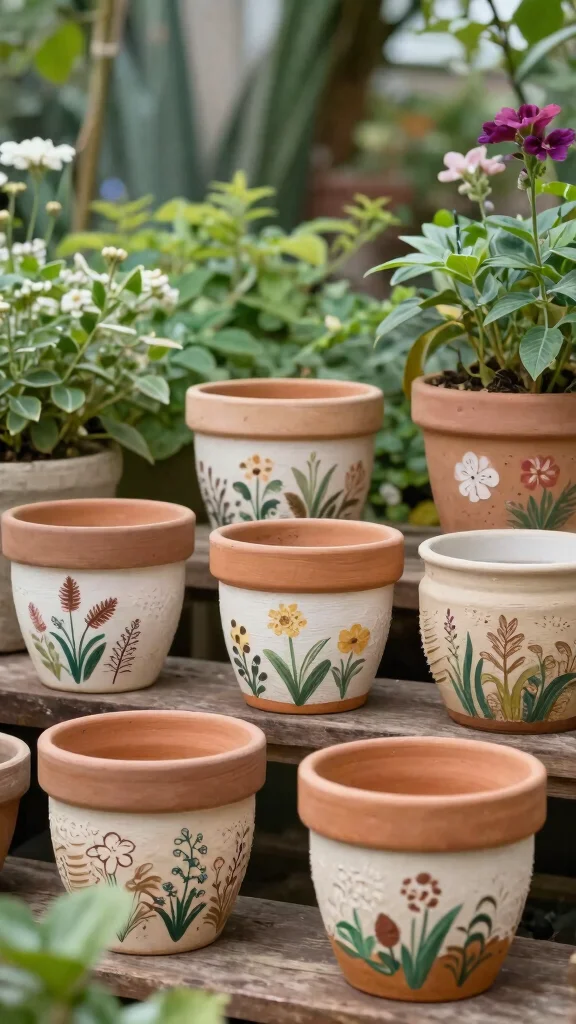
1. Rustic Charm with Earthy Tones
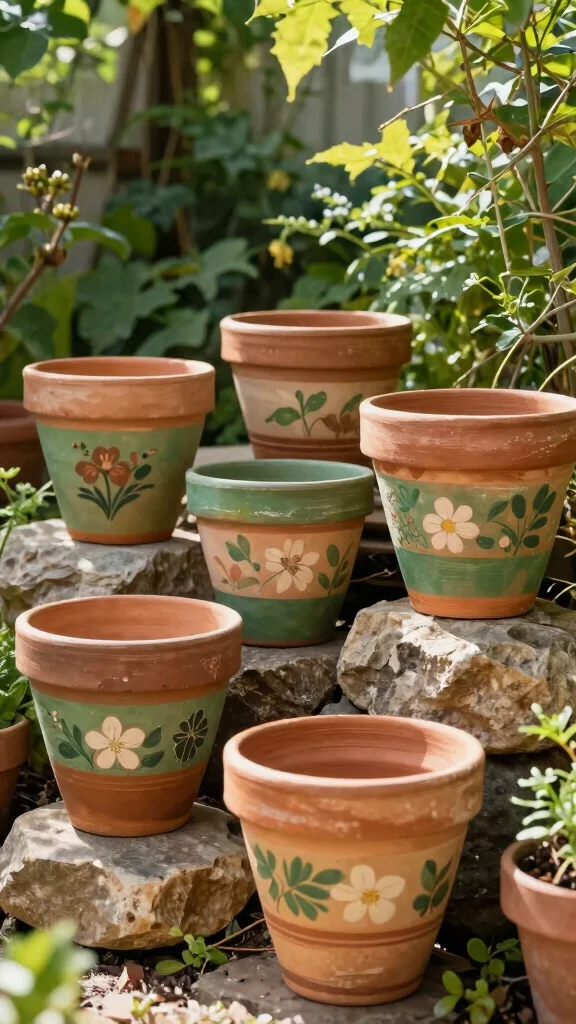
Embrace the beauty of nature by hand-painting your flower pots with warm, earthy tones. Imagine terracotta backgrounds adorned with deep greens and rich browns that evoke a cozy, rustic vibe. This style beautifully complements plants such as succulents and cacti, providing a natural aesthetic for your garden.
To craft these charming pots, begin with a base coat of terracotta paint. Once it’s dry, use a sponge or brush to blend in shades of green and brown, creating a harmonious look. Seal your designs with a matte finish to protect them from the elements.
Key steps to get started:
– Clean your pots thoroughly before painting.
– Choose natural paintbrushes for an organic finish.
– Pair your pots with stones or driftwood for a cohesive garden theme.
This approach enhances your garden’s visual appeal and fosters a serene atmosphere. You’ll enjoy the delightful transformation these pots bring to your outdoor space.
Hand painted flower pots make your garden feel personal and welcoming. Start with a terracotta base, blend greens and browns, and watch a simple project become a rustic centerpiece that suits succulents, cacti, and your own green thumb.
How To Choose The Right Hand-Painted Flower Pots
When it comes to creating unique gardening projects, selecting the right hand-painted flower pots is essential. You want pots that not only look beautiful but also serve practical purposes in your gardening endeavors. Here’s a guide to help you make the best choices:
1. Size Matters
Choosing the right size pot is crucial for your plants’ health. Small pots may dry out quickly, while large ones can hold too much moisture and lead to root rot. A general rule is to select a pot that is at least 1-2 inches larger in diameter than the plant’s root ball. For larger plants, consider pots that are at least 6 inches deep.
2. Material Considerations
The material of your flower pot affects both aesthetics and plant health. Terracotta pots are breathable and great for moisture control, while ceramic pots offer more colors and designs but may retain too much water. Plastic pots are lightweight and easy to handle but might not have the same visual appeal. Think about what material fits your garden’s style and your maintenance preferences.
3. Drainage Features
Good drainage is essential for healthy plants. Ensure your chosen pots have drainage holes at the bottom to prevent water from pooling. If you find a beautiful pot without drainage holes, consider using it as a decorative outer pot and placing a smaller, drain-enabled pot inside. This way, you can enjoy the design while keeping your plants happy.
4. Design and Aesthetics
Select designs that reflect your personality and garden theme. Bright floral patterns can add a cheerful touch, while monochrome designs offer elegance. Unique gardening projects often involve creative pot painting techniques. Think about how the colors and patterns of your pots will blend with your garden and home decor.
5. Budget Considerations
Hand-painted flower pots come in a range of prices. Set a budget before you start shopping to avoid overspending. While high-quality, unique pots may cost more, you can often find DIY flower pot designs that are budget-friendly yet still look stunning. Consider upcycling old pots by painting them yourself for a personal touch.
6. Purpose and Placement
Consider where you will place your pots. If they’re for indoor use, choose designs that complement your interior. For outdoor pots, select materials that can withstand weather changes. Think about whether the pots will be displayed on a patio, in a garden bed, or indoors near a window. The purpose will influence your choices.
Pro Tip: Before making a purchase, visualize your garden layout with the pots you are considering. This can help in understanding how everything will come together and ensure you select the right pots that will enhance your space.
By following these steps, you’ll be able to select hand-painted flower pots that not only beautify your garden but also create a sustainable atmosphere for your plants. Happy gardening! 🌱
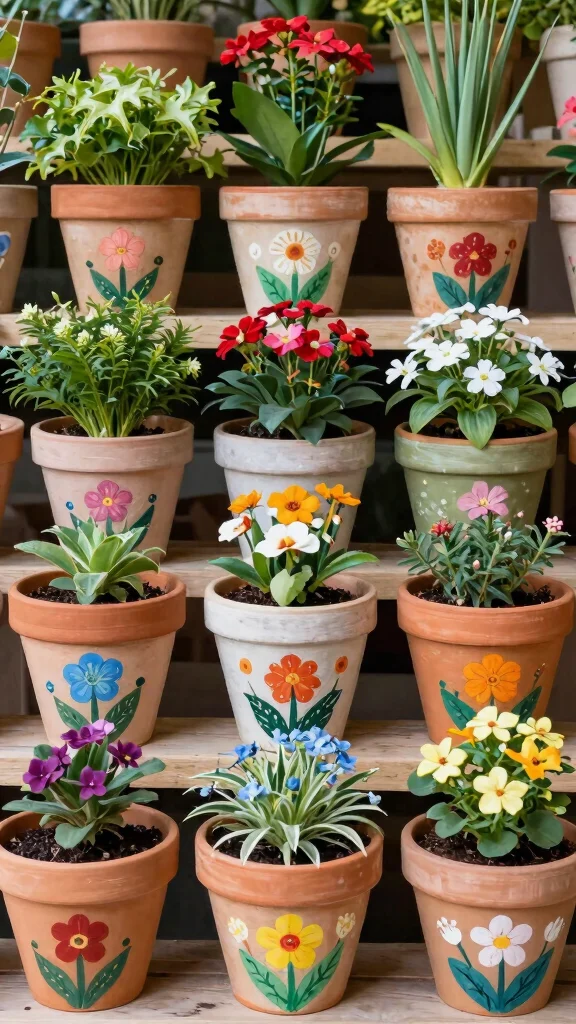
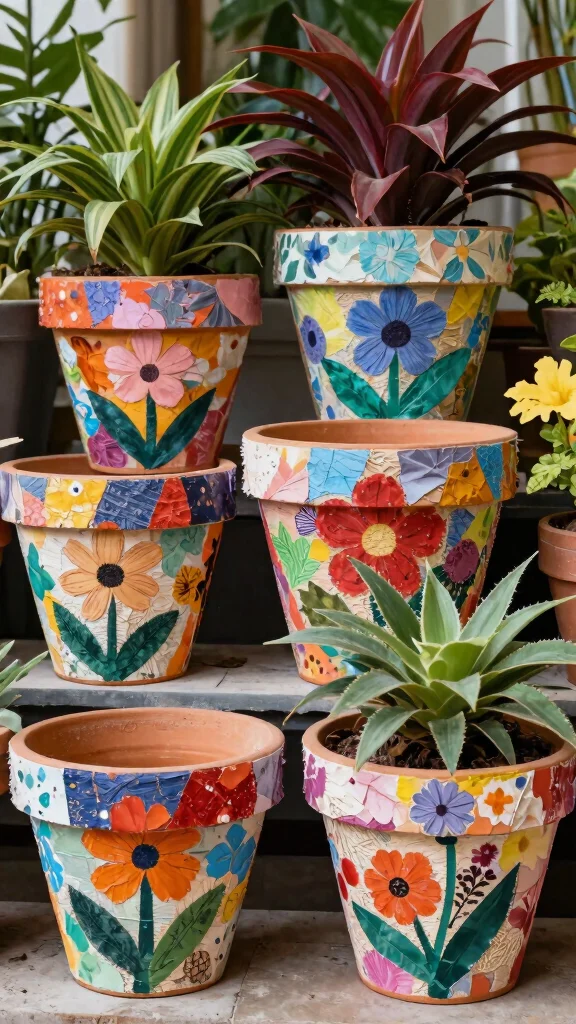
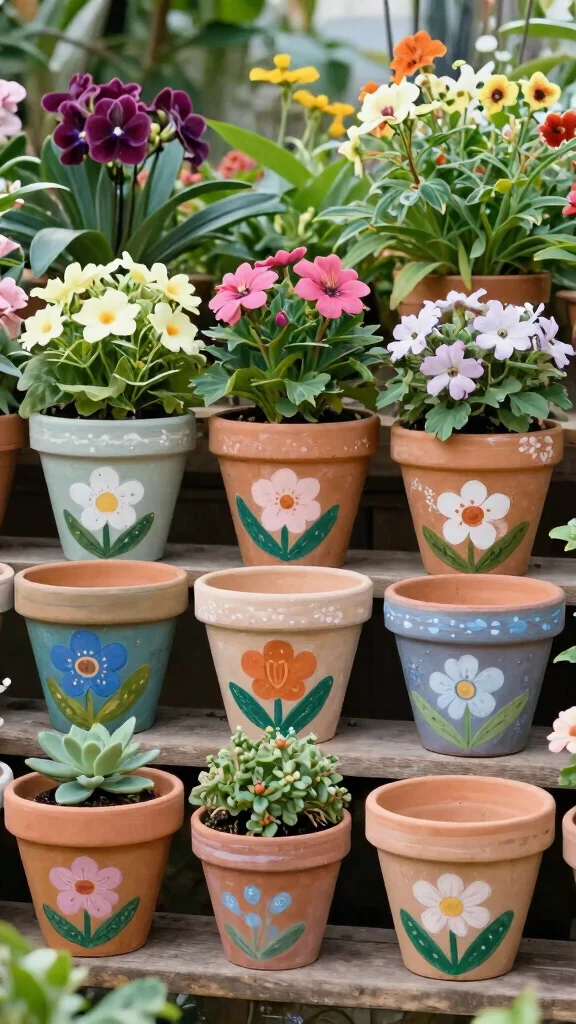
2. Bright and Bold Floral Patterns
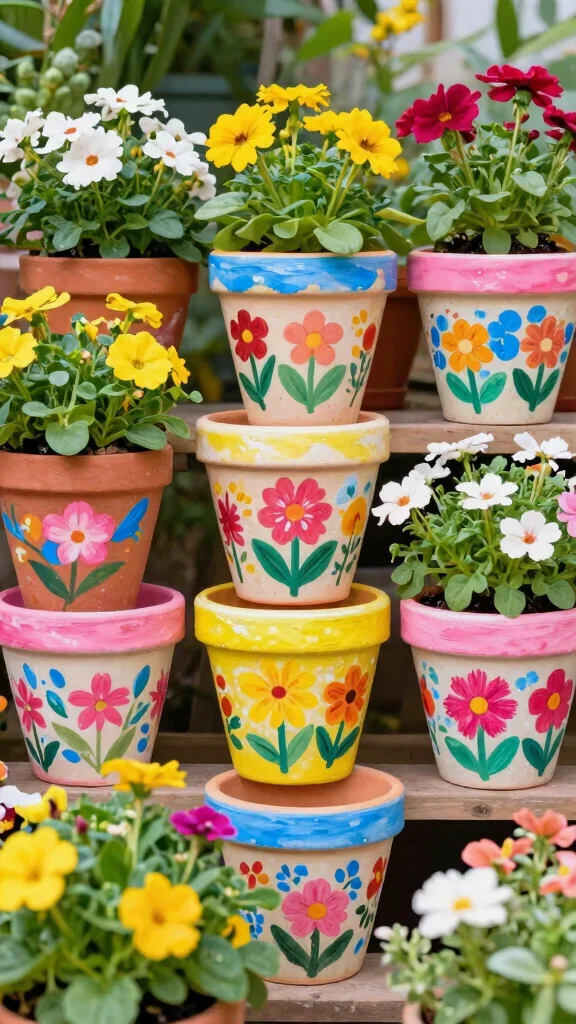
Looking to add a splash of color to your garden? Hand-painting your flower pots with vibrant floral patterns is an excellent way to brighten up your space. Bold colors not only enhance your garden’s beauty but also make your plants stand out.
Start with a white or light-colored pot to let your chosen colors pop. Use acrylic paints in eye-catching hues, experimenting with flower designs like daisies, sunflowers, or tropical blooms. A glossy finish will elevate the vibrancy and protect your artwork.
Quick tips to get started:
– Use painter’s tape for clean lines and edges.
– Mix colors directly on the pot for an artistic look.
– Try different flower shapes for added variety.
This colorful approach not only livens up your garden but also showcases your creativity. You’ll love the cheerful atmosphere these pots create in your outdoor space.
Fun fact: hand-painted flower pots in bold floral hues can boost garden photo appeal by up to 40%. Plain corners become eye-catching focal points you’ll love showing off.
3. Unique Geometric Designs
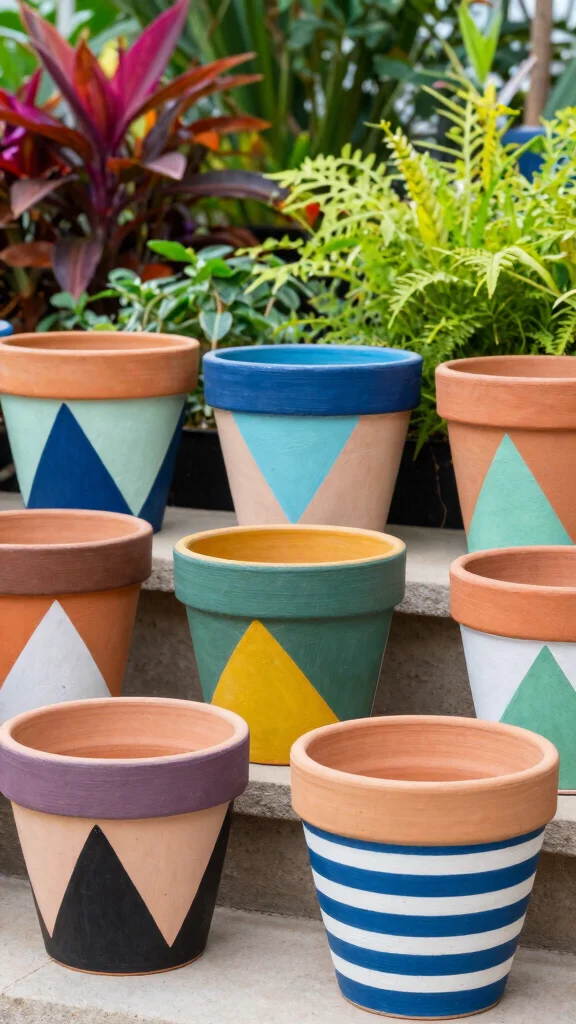
Want to introduce a modern touch to your gardening? Hand-painted geometric designs on flower pots can achieve just that. Choose shapes like triangles and stripes in contrasting colors to create a contemporary masterpiece.
Start with a square or cylindrical pot and paint a base color that complements your decor. Once dry, use painter’s tape to create geometric patterns, filling them with bold colors or metallics for a luxurious finish.
Essential steps to follow:
– Select a color palette that matches your style.
– Mix matte and glossy finishes for depth.
– Add gold or silver accents for an upscale touch.
This stylish design choice enhances your garden’s aesthetic and allows for personal expression. You’ll appreciate the fresh, modern vibe these pots bring to your outdoor area.
4. Whimsical Character Pots

Add a playful element to your garden with whimsical character pots! Transform regular pots into charming creatures using paint. Picture friendly frogs, cheerful ladybugs, or even mythical beings bringing smiles to your garden.
Choose rounded pots for easier detailing, and start with a solid base color. Use fine brushes to add fun features like eyes and mouths, ensuring to seal your artwork once dry.
Fun tips to consider:
– Opt for non-toxic paint suitable for outdoor use.
– Draw inspiration from your favorite animals or characters.
– Incorporate googly eyes for an extra touch of whimsy.
This creative project not only enhances your garden’s charm but also sparks joy. You’ll enjoy the delightful atmosphere these character pots create in your outdoor space.
Did you know hand painted flower pots last up to 2x longer outdoors when sealed with outdoor-safe sealant and non-toxic paint? Whimsical character pots turn garden nooks into charm magnets—perfect for small spaces.
5. Motivational Quote Pots
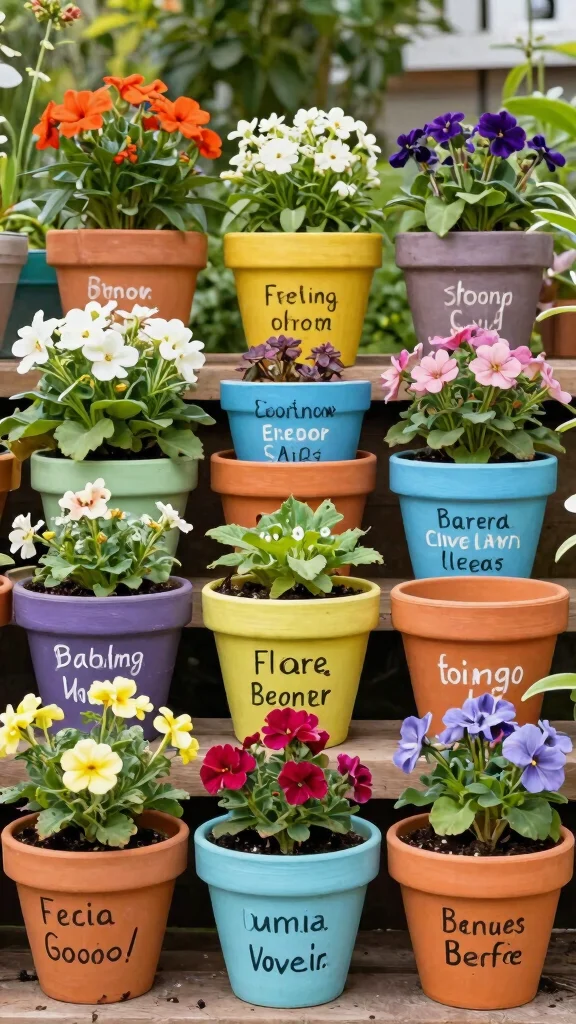
Brighten your garden with hand-painted pots featuring motivational quotes. These pots not only nurture your plants but also inspire positivity each day. Select quotes that resonate with you and paint them beautifully across your pots.
Begin with a plain pot and apply a base color of your choice. Use stencils or freehand your quotes, adding decorative elements to frame them nicely. A clear finish will protect your words from fading.
Tips to enhance your project:
– Use a paint pen for clean lettering.
– Choose colors that match your plants.
– Add small illustrations for extra charm.
This thoughtful approach not only cultivates a beautiful garden but also promotes an uplifting environment. You’ll feel inspired every time you tend to your plants.
6. Ombre Effect Pots
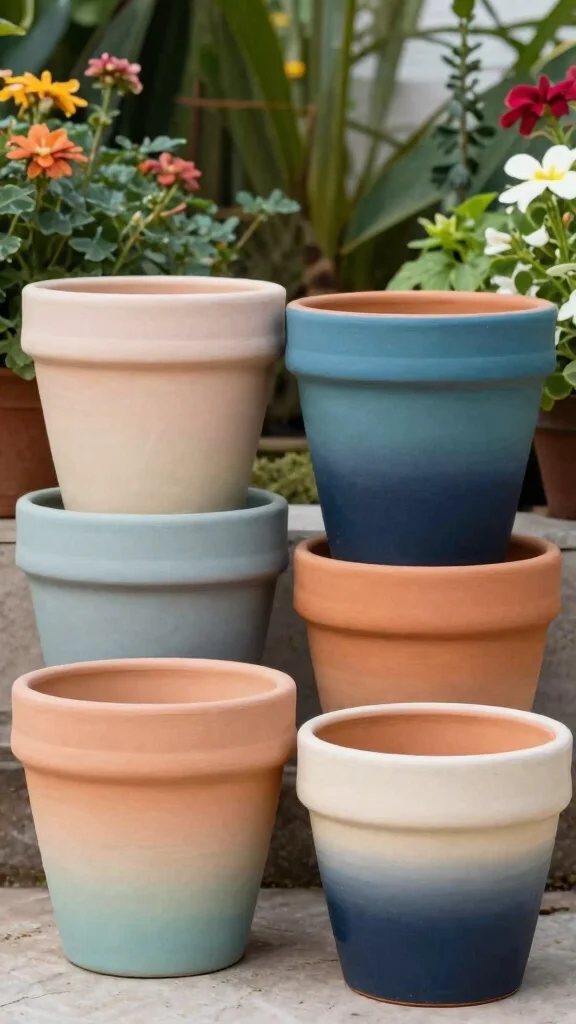
Achieve a stunning gradient look with ombre effect pots that add style to your garden. This technique blends colors beautifully, creating a modern touch that matches any decor.
Select two or three complementary colors for your pot. Apply the lighter shade to the top half, gradually blending down into the darker shade using a sponge or brush. Sealing your ombre finish will protect it against the weather.
Key tips for a successful project:
– Stick to colors within the same family for a subtle look.
– Consider metallics for a glamorous finish.
– Practice blending on paper before applying it to the pot.
This method not only enhances your pot’s appearance but also brings a contemporary flair to your garden. You’ll love the beautiful gradients that catch the eye.
7. Stenciled Patterns
Stenciling offers a quick and easy way to create intricate designs on your hand-painted flower pots. This method allows for precision, making your garden containers look professionally crafted.
Choose your favorite stencils, such as floral motifs or geometric shapes, and position them on your pot. Use a sponge or brush to apply paint over the stencil for a crisp design. Mixing colors can give a vibrant appearance, or you can stick to one color for a classic look.
Helpful tips for success:
– Secure the stencil with painter’s tape to prevent slipping.
– Experiment with various stencil designs for uniqueness.
– Use contrasting colors for standout patterns.
This technique not only beautifies your pots but also showcases your artistic flair. You’ll enjoy the professional look of your stenciled creations.
8. Seasonal Theme Pots
Celebrate each season with hand-painted pots that reflect the beauty of the changing year. For winter, think cool hues and snowflakes; for spring, pastels and blossoms; summer could feature sunny designs, while fall brings warm colors and leaves.
Choose pots that are easy to store between seasons, painting them according to seasonal themes. Use bright colors for spring and summer, and warmer tones for fall and winter. Sealing your designs will keep them looking fresh regardless of the weather.
Tips to enhance your seasonal decor:
– Change out pots as the seasons shift for a refreshing look.
– Involve the family in painting themed pots together.
– Store seasonal pots properly to ensure longevity.
This approach not only beautifies your garden but also brings a festive spirit throughout the year. You’ll love the vibrant displays that celebrate each season.
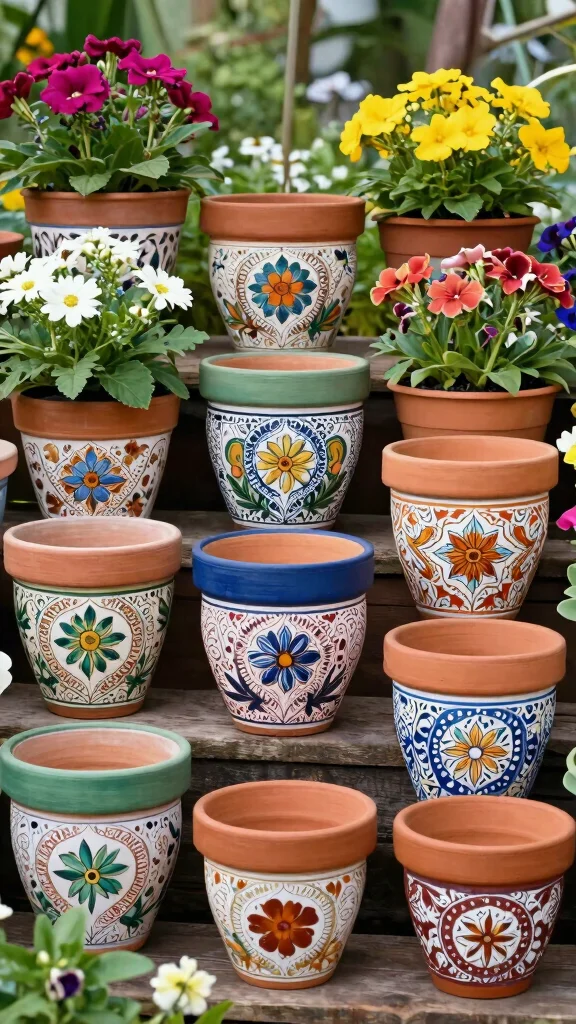
9. Vintage Inspired Pottery
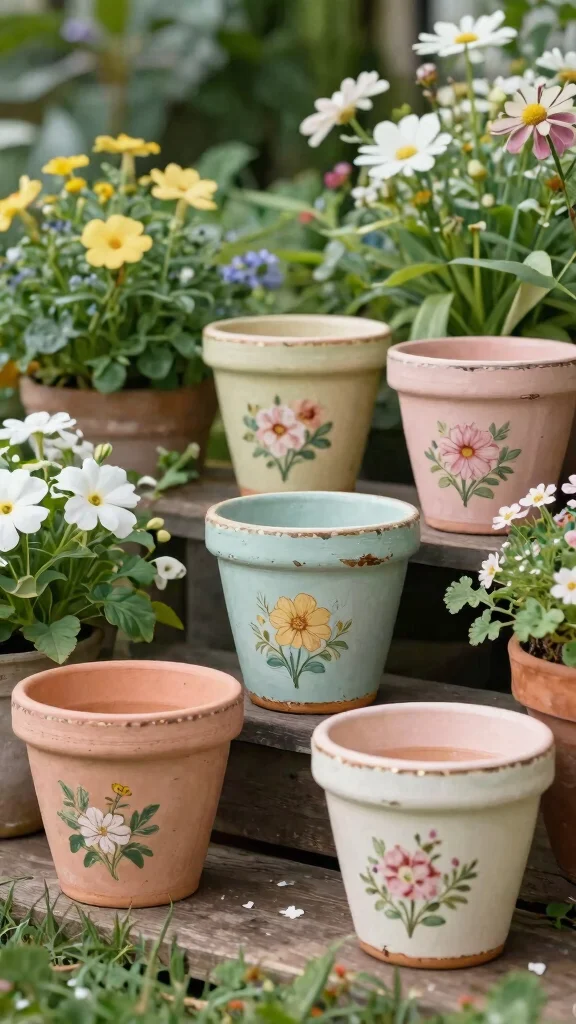
Add a nostalgic touch to your garden with vintage-inspired painted flower pots. This style features muted colors, floral decals, and classic patterns reminiscent of bygone eras.
Choose pots in soft pastel shades and incorporate vintage patterns like roses or lace designs. Distressing the edges can enhance the nostalgic feel, while a matte finish complements this timeless style.
Tips for creating your vintage look:
– Research vintage patterns you love and replicate them.
– Use a dry brush technique for a worn appearance.
– Mix and match different vintage designs for variety.
This charming approach not only beautifies your garden but also evokes lovely memories. You’ll enjoy the classic elegance that these pots bring to your outdoor space.
10. Monochrome Elegance
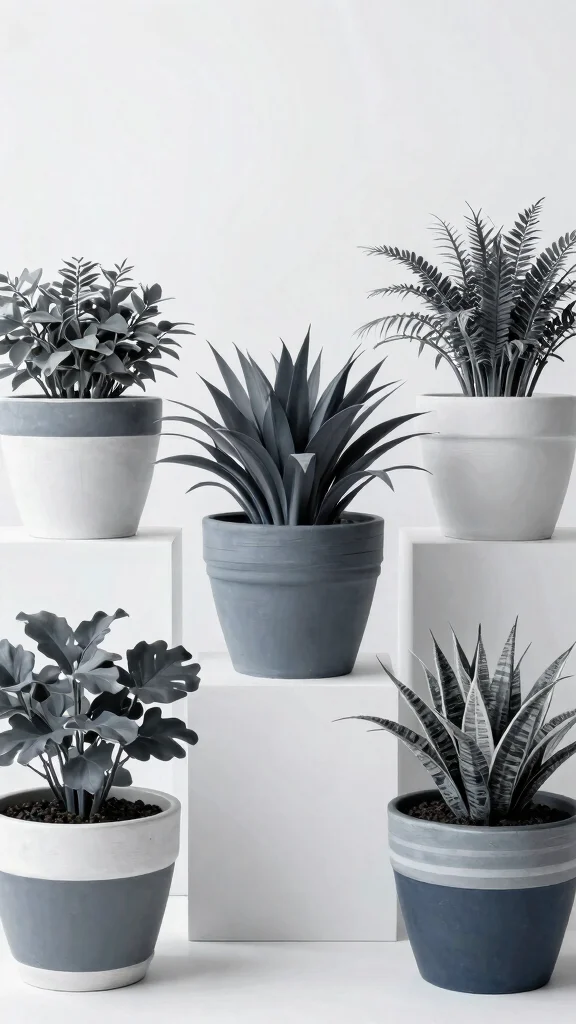
For a sleek and minimalist touch, consider painting your flower pots in a monochrome palette. This style utilizes shades of a single color—think black and white or varying shades of blue—to create an elegant look.
Start with a base coat of your main color, then layer details in contrasting shades to add depth. This technique creates a stunning focal point in any garden, providing a modern aesthetic. Remember to seal your pots to keep their sophisticated appearance intact.
Tips for achieving this look:
– Select contrasting shades for added drama.
– Limit your palette to two or three shades for cohesion.
– Pair monochrome pots with colorful plants for striking contrast.
This design choice elevates your gardening style and adds a chic sophistication. You’ll appreciate the refined beauty that these pots contribute to your landscape.
11. Creative Collage Pots
For those who enjoy mixed media, crafting collage flower pots can be a delightful project. Combine paint with decoupage elements like fabric, paper, or even old photographs for a truly unique creation.
Start by applying a base layer of paint to your pot. Once dry, arrange your chosen materials using glue or Mod Podge, sealing everything with a clear coat for protection. This style allows for personal expression and creativity in your garden.
Tips to enhance your collage:
– Use materials that reflect your interests or memories.
– Add fabric pieces for interesting textures.
– Maintain a cohesive color palette for a polished look.
This imaginative approach not only beautifies your garden but also showcases your personality. You’ll love the artistic flair that these collage pots bring to your outdoor space.
12. Nature-Inspired Textures
Bring a touch of the outdoors to your garden with pots that mimic natural textures like stone, bark, or leaves. This approach adds an earthy feel, connecting your garden with nature.
Start by painting your pots in earthy colors, then use sponging or layering techniques to create depth and texture. Incorporating natural materials as stamps can yield unique patterns. Be sure to seal your pots to protect these beautiful designs.
Tips for achieving natural textures:
– Gather materials from nature for unique prints.
– Experiment with color layering for rich textures.
– Use a matte finish to enhance the organic look.
This method not only beautifies your garden but also fosters a connection with the natural world. You’ll appreciate the stunning organic touches these textured pots provide.
Conclusion
Hand-painted flower pots are more than just gardening containers; they are a canvas for your creativity and a way to express your personal style. Each unique design can transform your garden into a vibrant showcase of art and nature.
Whether you choose earthy tones, whimsical characters, or sophisticated monochromes, the effort you put into these DIY projects pays off tenfold in the joy they bring. Embrace the fun of painting and let your garden reflect your personality!
Note: We aim to provide accurate product links, but some may occasionally expire or become unavailable. If this happens, please search directly on Amazon for the product or a suitable alternative.
This post contains Amazon affiliate links, meaning we may earn a small commission if you purchase through our links, at no extra cost to you.
Frequently Asked Questions
What makes hand painted flower pots a great upcycled gardening project?
Hand painted flower pots let you breathe new life into old containers, turning ordinary items into one-of-a-kind decorative plant containers. It’s a sustainable, creative way to add personality to your garden while embracing upcycled style. To get started, wash the pot, let it dry, lightly sand edges, apply a primer if needed, sketch a design or theme, paint with outdoor acrylics, and seal for durability. With hand painted flower pots, your space gains character and reduces waste.
Tip: choose a theme that complements your plants and outdoor lighting for a cohesive look.
What supplies do I need to start DIY flower pot designs with upcycled containers?
Essential supplies include paints suitable for outdoor use, brushes in multiple sizes, a primer, masking tape or stencils, and a protective top coat. Don’t forget upcycled containers like terracotta pots, metal tins, or repurposed jars, plus a protective sealant and a tester sheet for color combos. Having these tools helps you master DIY flower pot designs and creates decorative plant containers that last.
Optional extras: sponges for texture, vinyl decals, and a sanding block to smooth surfaces before painting.
What are some creative pot painting techniques that work well for outdoor hand painted flower pots?
Great outdoor looks come from creative pot painting techniques. Try dry brushing for subtle texture, sponging for depth, and masking with painter’s tape for clean geometric patterns. You can also experiment with stenciling floral motifs, or marbling with water-based paints. After painting, seal with an outdoor-grade varnish or ceramic sealer to protect against sun and rain, and let it fully cure before planting. These methods keep your hand painted flower pots vibrant year-round.
Pro tip: test colors on a scrap surface before applying to the pot to avoid surprises.
How can I personalize my hand painted flower pots to create personalized garden decor?
Personalizing pots is all about matching your garden vibe. Choose a color palette that complements your landscape, then add initials, favorite quotes, or seasonal motifs. Consider a cohesive theme (boho, cottagecore, modern) across multiple pots for a unified look. Sketch ideas first, transfer designs with light pencil marks, paint with durable outdoor paints, and seal. This approach creates personalized garden decor and makes unique gardening projects you’ll treasure or gift.
Tip: label pots with plant names for a functional decorative touch.
What care tips help handmade pots last longer and stay vibrant in a garden?
To extend life and vibrancy: use weatherproof paints and seals, ensure pots have good drainage, and avoid overwatering. Place pots where they won’t endure direct, harsh sun all day if possible, and re-seal or touch up chips as needed. Clean with a soft brush and mild soap, then allow to dry fully before reapplying paint or sealant. In winter, store or cover delicate pots to prevent cracking. Following these steps helps your decorative plant containers stay looking fresh and your hand painted flower pots last for many seasons.
Related Topics
hand painted flower pots
upcycled gardening
DIY flower pot designs
creative pot painting
personalized garden decor
unique gardening projects
decorative plant containers
sustainable gardening
easy DIY
summer gardening
colorful pots
beginner friendly